
Sleeknote built a Standard Integration, using Agillic's Recipient API, which allows you to easily connect your campaigns in Sleeknote to your Agillic instance.
This article will cover the basic principles that you need to be familiar with to set up the Sleeknote Integration, including the relevant information in Agillic that you will need. Thus, this article will only cover the parts that are set up in Agillic.
The topics in this article include:
- Article on Sleeknote
- Data Fields
- Date
- Radio Button and Drop-Down Menu
- Campaign Fields
- Triggered Flow Execution
- Finding the API Key
- Testing
With the integration set up, you can get, create, or update your recipients with Person Data in Agillic and even use person data side-effects to trigger certain flows or additional side-effects for the recipients.
In order to use this integration, your organization must have:
-
An Agillic instance, with a user who has
- Access to create Agillic API Credentials
- Access to the Agillic Data module
- Access to the Agillic Flows module
- Email field which is set to unique
- A Sleeknote account
Article on Sleeknote
Sleeknote also has an article on how to setup the integration in the Sleeknote platform which you can find HERE.
As this integration is built and maintained by Sleeknote, you should contact your responsible there, to hear about the Sleeknote-specific requirements.
Data Fields
In order to set up the integration, you need to be familiar with the data structure in Agillic. Especially important are the fields used for communication, so make sure you are aware of the fields used for email address, mobile number, and permissions. You can check which fields are used in System Settings under Person Data:

In the Data module in Agillic, it is possible to create and view all Person Data fields. Person Data fields allow you to store Person Data for your recipients. Make sure that you understand how the Person Data fields are used before referencing them in Sleeknote!
Permissions
The integration should only send recipients to Agillic if they have provided consent. This consent should be included in the integration as a data field: building a double opt-in campaign is an additional step you may want to take. Make sure you are familiar with your Agillic instance's existing permission structure, before handling permissions with this integration.
Read more about our best practice of permission handling here.
Date
If you use the date field type you have to adjust the format in Sleeknote so it matches the default format in Agillic (dd.MM.yyyy).
Read more about API settings here.
Radio Button and Drop-Down Menu
When working with Radio buttons and Drop-downs in Sleeknote, it is possible to set a 'Display Text' and a 'Value' for your answers, meaning that you can choose to display one answer to your recipient and store another value for that answer that will not be visual to your recipients.
Campaign Fields
Campaign Fields in Sleeknote are the fields that will be visible to your visitors. These fields must be mapped to the relevant Person Data fields in Agillic. So, for example you can choose to map the 'Email' Campaign Field in Sleeknote to the 'EMAIL' Person Data field in Agillic.
You can also send over hidden "Custom Data" from Sleeknote. Here, it is possible for you to type in the text you wish to send to Agillic and map it to the relevant Person Data field. So, if you want to send over lead data such as the campaign source, you can type in 'Sleeknote' and map it to your Person Date field 'CAMPAIGN_SOURCE'.
Furthermore, it is possible to send over "Additional Data" from Sleeknote, which are hidden standardised data fields such as the sign up page.
The benefit of using Custom Data and Additional Data Fields is that it allows you to set static values for all signups from a particular source, to help you get an overview of where your leads are coming from.
Sleeknote has an article on how to set up the Campaign Fields in the Sleeknote platform, which you can find here.
Triggered Flow Execution
The way to trigger Agillic Flows from Sleeknote, is by using a Person Data Side Effect. With a Person Data Side Effect, you can set up actions that occur automatically when a Person Data field changes from one value to another. This means that only the individual recipients triggering the Person Data Side Effect will go through the Flow. You can read more about triggered flows here.
In addition, you will have to set up a condition on the Flow, specifying which criteria recipients should meet to be included in the send out.
A Person Data Side Effect can for example be used to:
-
Start flows configured to be triggered by a Person Data Change such as:
- Confirmation of competition participation
- Double opt-in campaign
- Communication directly related to signup
As an example, imagine that a recipient has signed up for a Christmas competition and you want to send an email thanking them for their participation. In order to do this, a Flow must be triggered when they sign up in Sleeknote. This can be done by mapping a Custom Data field in Sleeknote named 'Sleeknote_Christmas_Competition' for example, to a Person Data field in Agillic named 'CAMPAIGN_SOURCE'. When the recipient finishes their sign-up in Sleeknote, a Flow in Agillic is triggered with the Person Data Side Effect, as the Person Data field 'CAMPAIGN_SOURCE' goes from being empty to being populated with the value 'Sleeknote_Christmas_Competition'.
Additionally, you should set up a condition specifying that the Person Data field 'CAMPAIGN_SOURCE' must contain 'Sleeknote_Christmas_Competition', in order for the recipient to continue in the Flow.
If another competition is run, for example a summer competition, the condition should specify that the Person Data field 'CAMPAIGN_SOURCE' must contain 'Sleeknote_Summer_Competition', in order for the recipient to continue in the Flow.
Be aware that this setup results in the Person Data field 'CAMPAIGN_SOURCE' being overwritten every time a recipient signs up for a new competition.
When the Sleeknote Campaign is no longer in use, make sure to deactivate the corresponding Flow in Agillic.
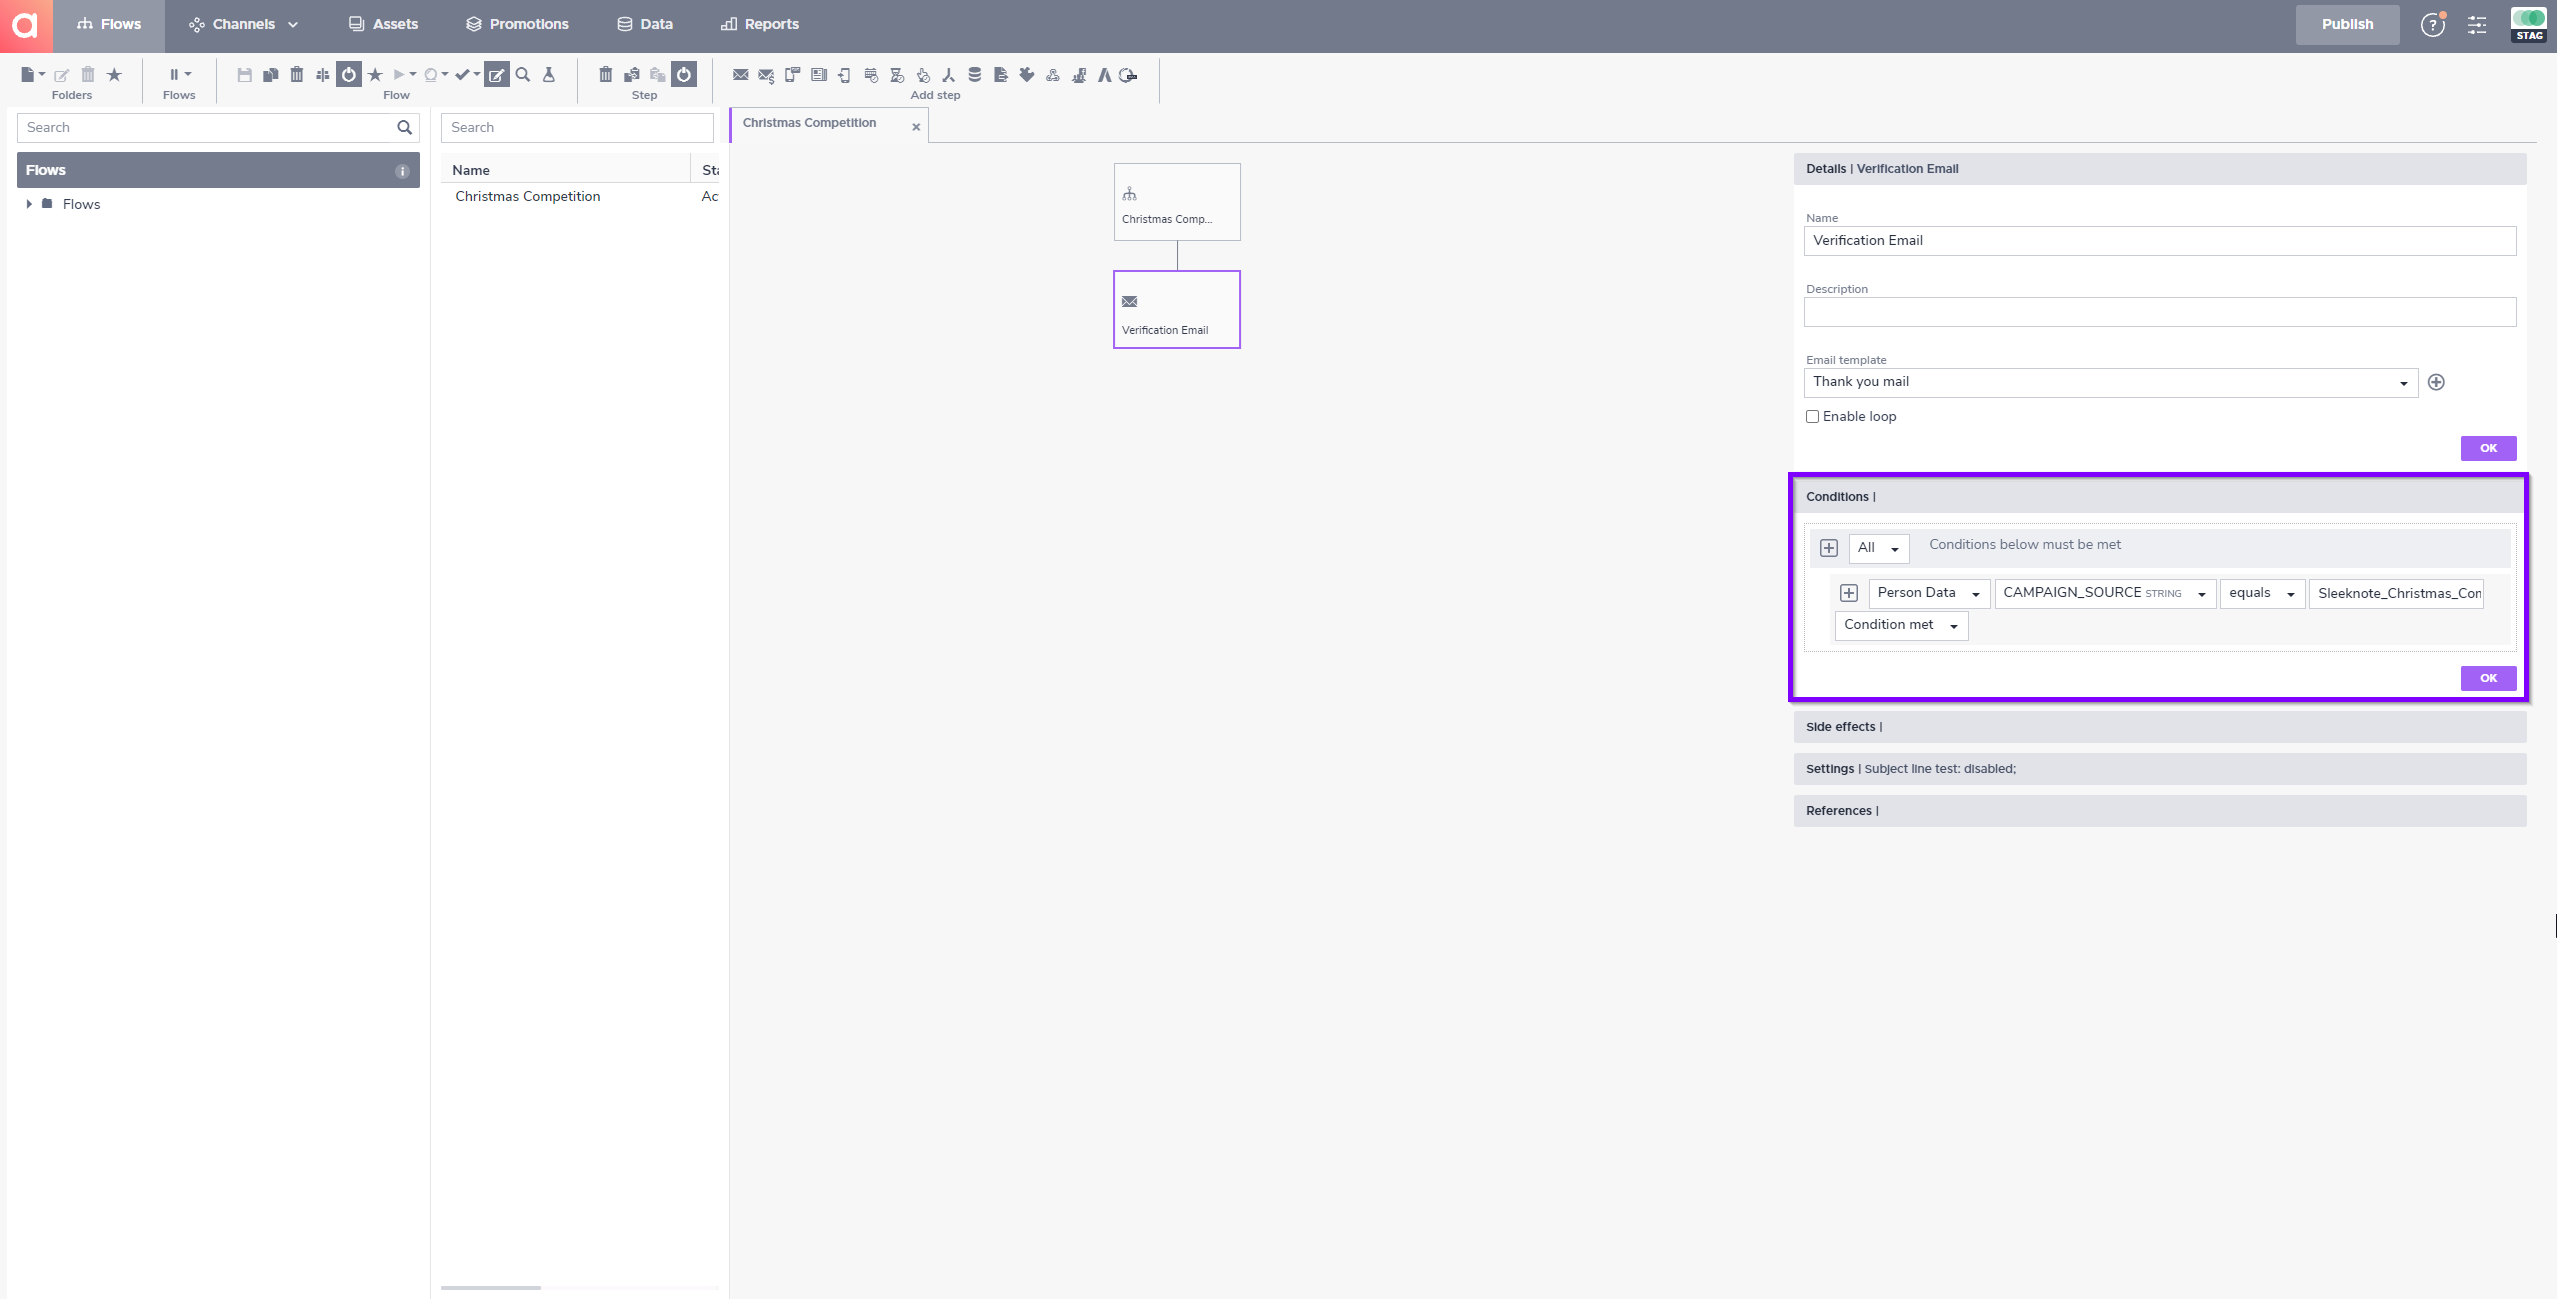
A flow that should be triggered for recipients who have signed up for the Christmas Competition
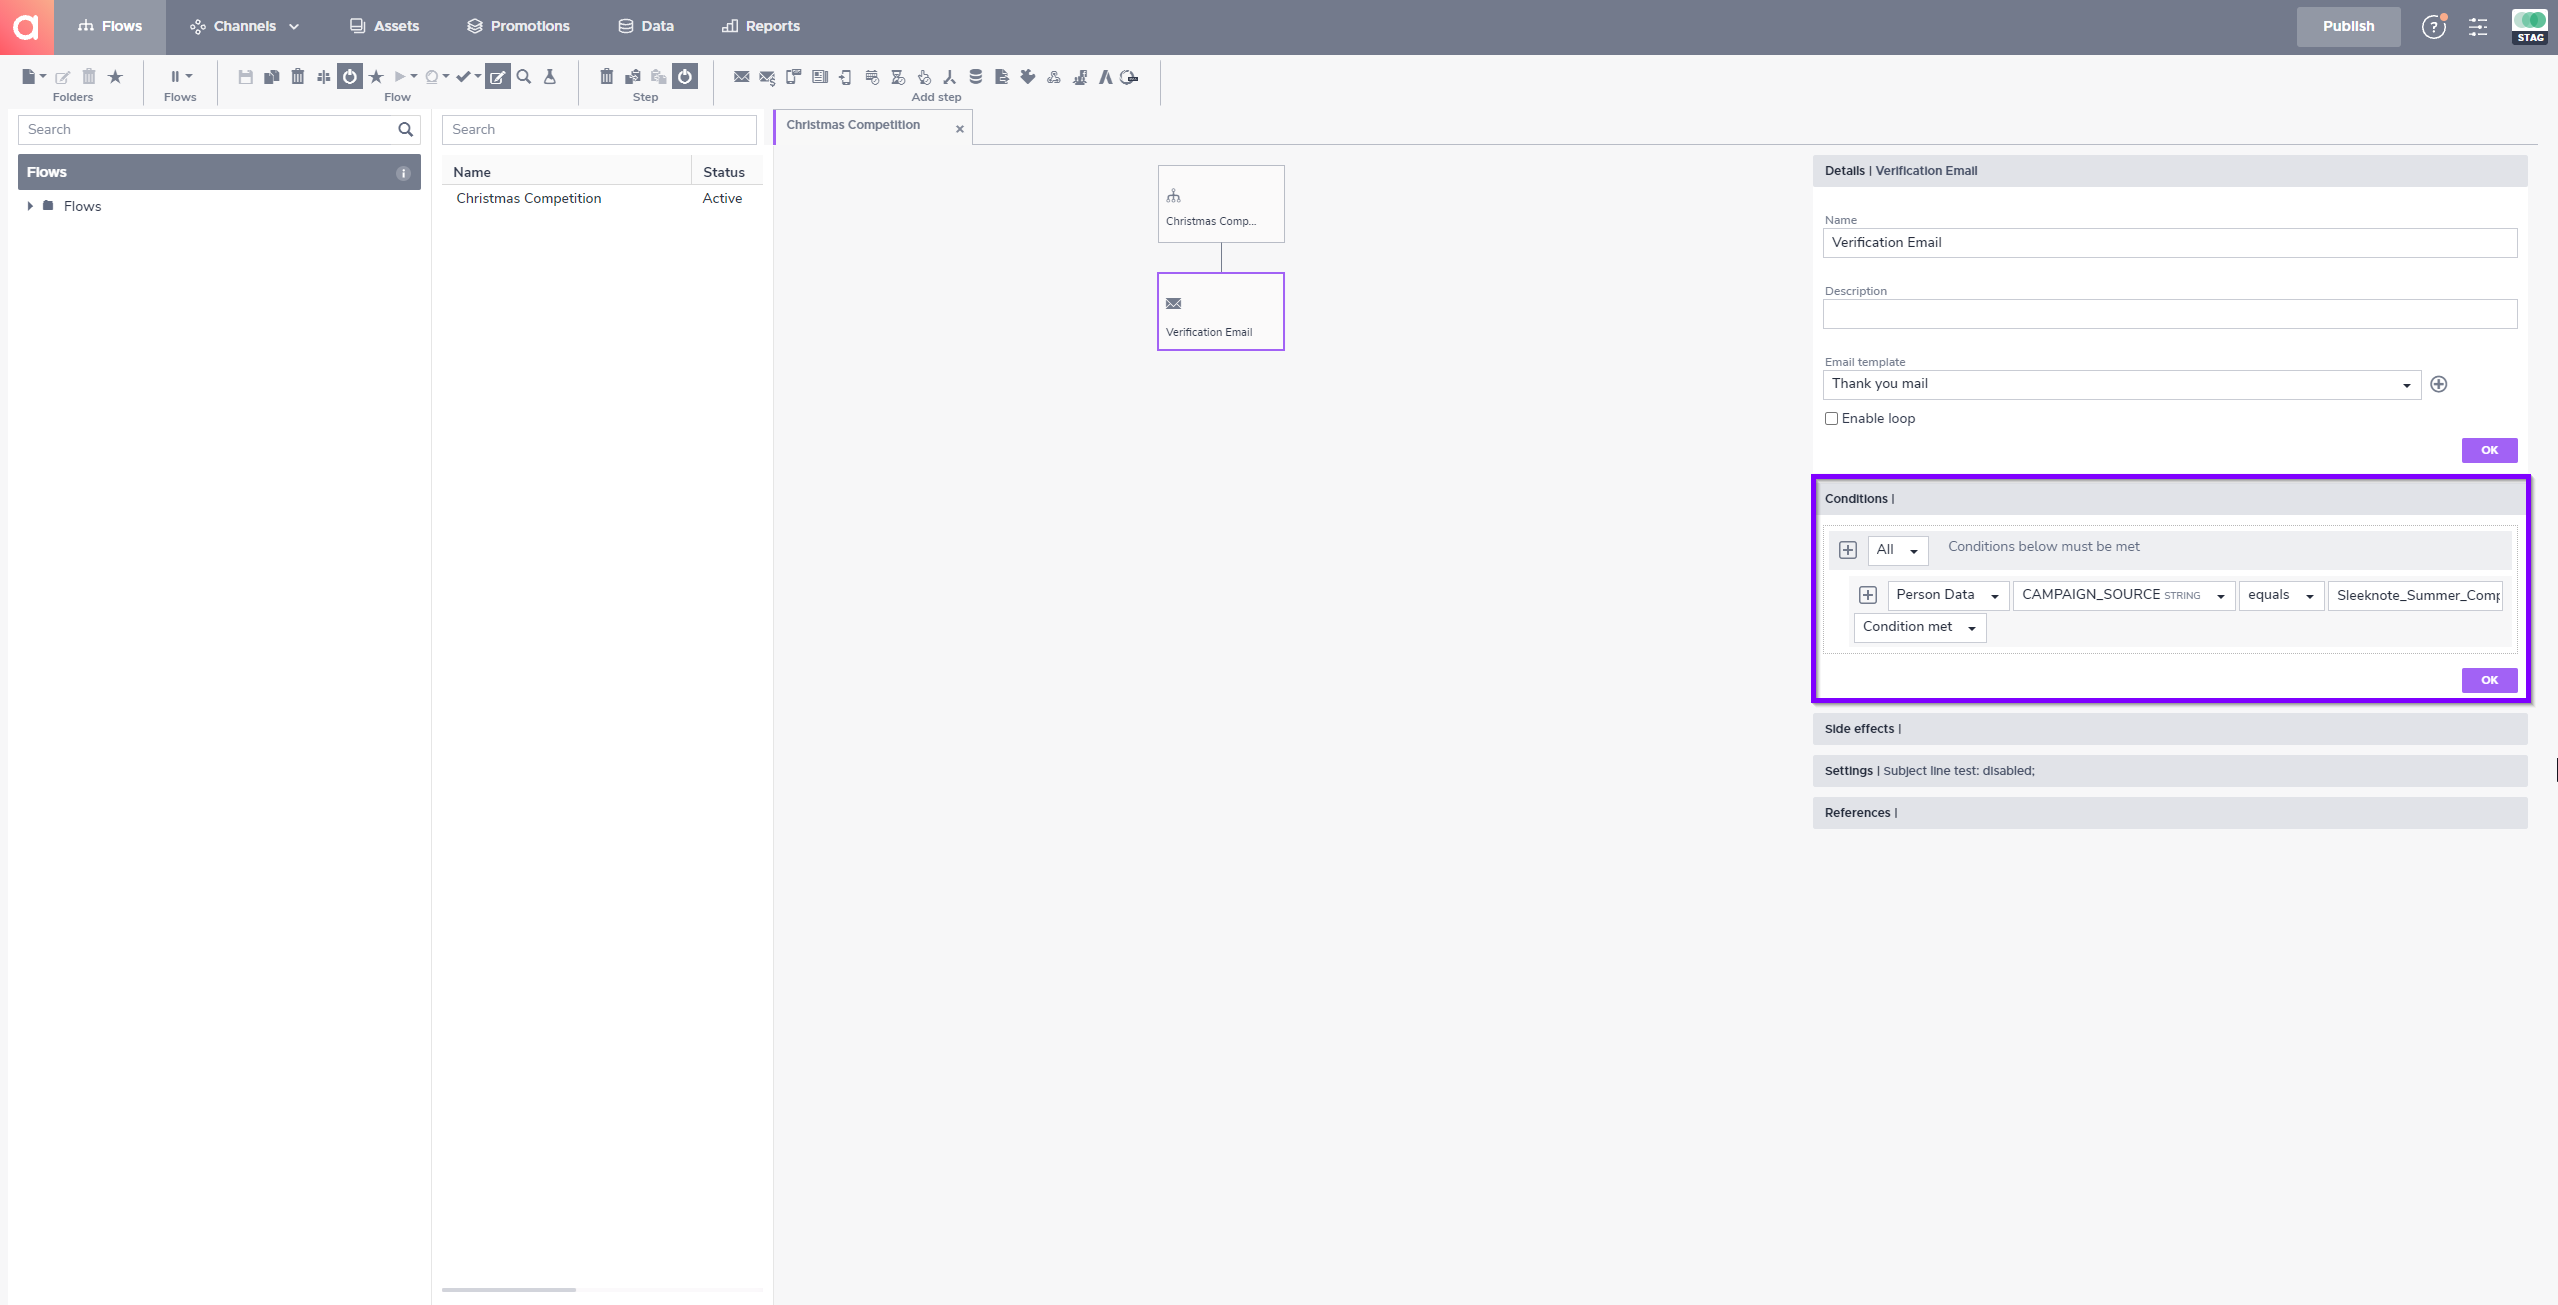
A flow that should be triggered for recipients who have signed up for the Summer Competition
Finding the API Key
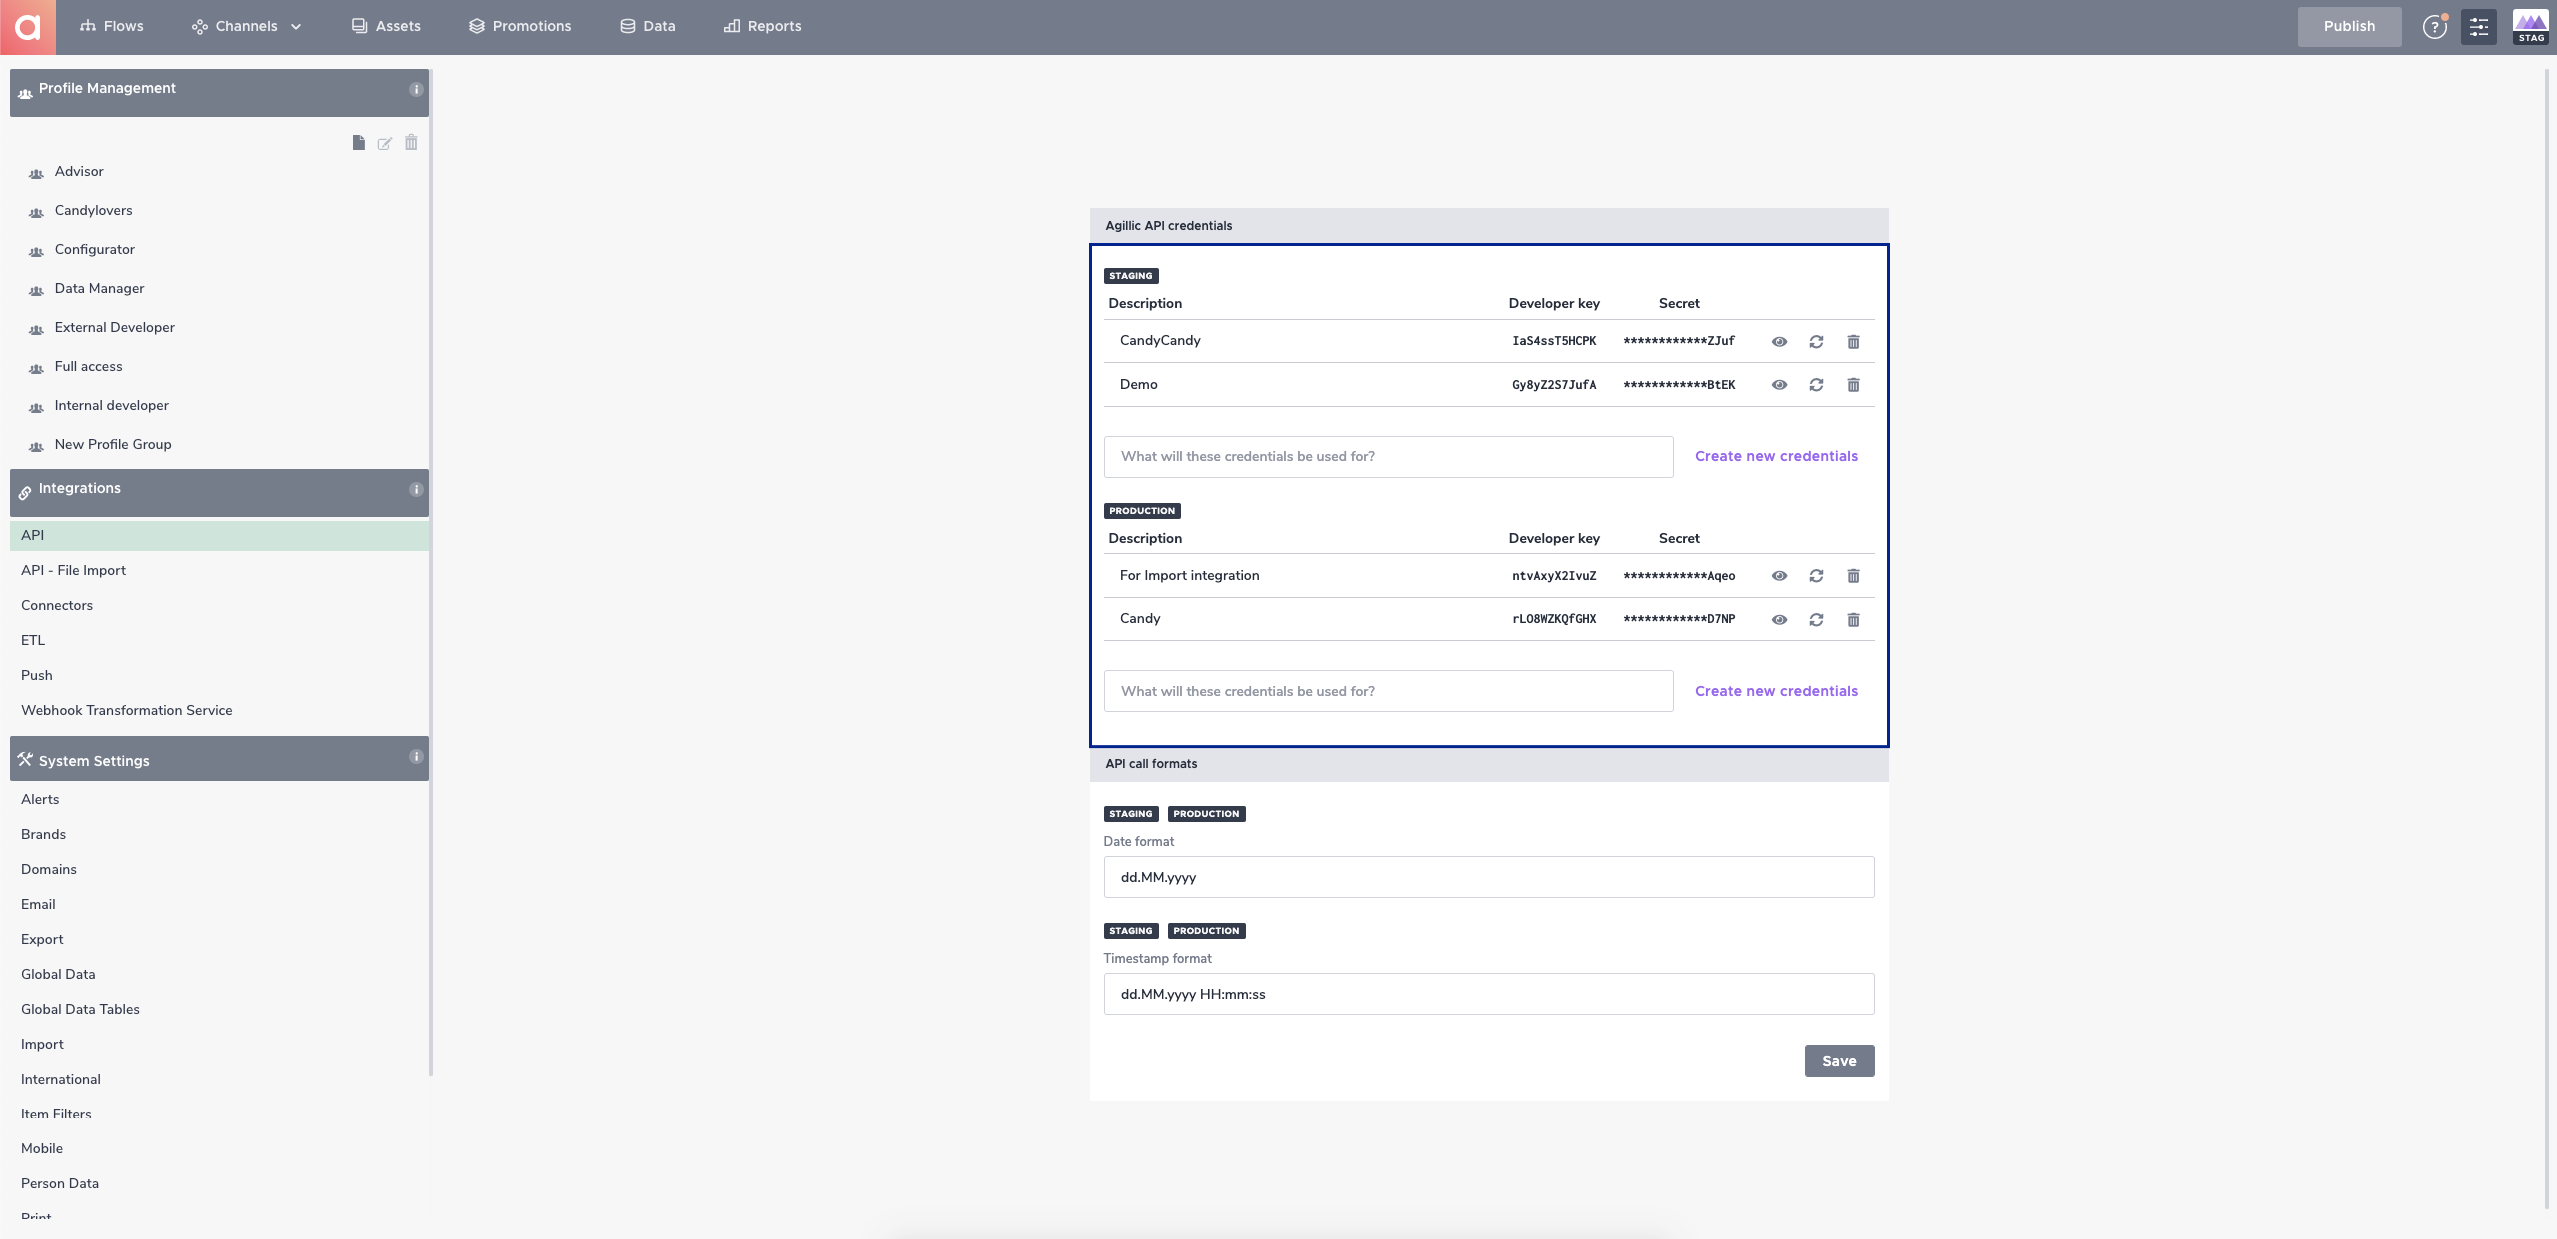
As the integration is API based, you need to locate your Developer Key and Agillic Secret in your Agillic instance and insert them in Sleeknote. This will authorise the call to your Agillic instance. Every time a new Sleeknote Campaign is created, you need to set the Developer Key and Agillic Secret.
The API keys are separate between your staging and production environment. In this way, you should conduct all your testing towards your staging environment with test recipients and when you are ready to go live, you need to switch to the API keys on production. By replacing the keys with production values, the integration will send the API calls to your production database.
In order to find the API keys navigate to System Settings and Integrations. You can read more about API Settings here.
Testing
Each Sleeknote Campaign using the integration should be fully tested on your Agillic staging environment with staging API Credentials, before publishing the Agillic entities to production, and using production API credentials in Sleeknote. This can include full end-to-end tests, all the way from the Sleeknote Campaign, to the recipients created & updated, permissions set, communications received, and any other additional data set through the integration.
When testing the Sleeknote integration to see if the data from Sleeknote is correctly transferred to Agillic, it can be useful to create a Details View in Agillic, as it makes it easier for you to investigate your recipients' data. You can read more about how to work with the Details View here.
It can also be useful to investigate your recipient using the Investigator, as it can provide valuable information when troubleshooting a campaign or when you need to know why, when, or how a recipient received a specific type of communication. Go to Investigating a Recipient to read more about this.
For additional information on our best practice on testing in Agillic, go to our Best Practice on Workflow in Agillic.