
After you've made your Welcome Campaign, you might want to create a Newsletter Campaign.
The Newsletter Campaign could, for example, contain some recommended products or relevant offers for the recipient. Usually, you would schedule the Newsletter Campaign to run one time on a date in the future, which is what we will do with this example.
In this example, we've imagined making a newsletter campaign for Agillic Candy. Please note that this is meant as a model and an example. Even if it doesn't fit your use case perfectly, you might get useful ideas, best practices, and insights into how the platform works. It's meant for you to insert the data that fits your use case.
Also, please note that this example uses some Events, Person Data, and landing pages that are pre-made and thus a prerequisite for this campaign. Most of these can be replaced by the fields that fit your company's use case.
This article will go through these steps in the process of building the campaign:
- Creating the Target Group
- Creating the Promotion
- Creating the Newsletter Email
- Creating the Newsletter Campaign Flow
In order to create a Newsletter Campaign in the Content module, you will need to have set up the correct Target Group in the Data module. This Target Group will segment recipients based on some Conditions.
How to Create a Target Group
- Open the Data module.
- Open the Target Groups section.
- Click 'Create New Target Group' in the Folders toolbar to create a new Target Group.
- Give the Target Group a suitable name, such as 'Newsletter Receivers' and click 'OK'.
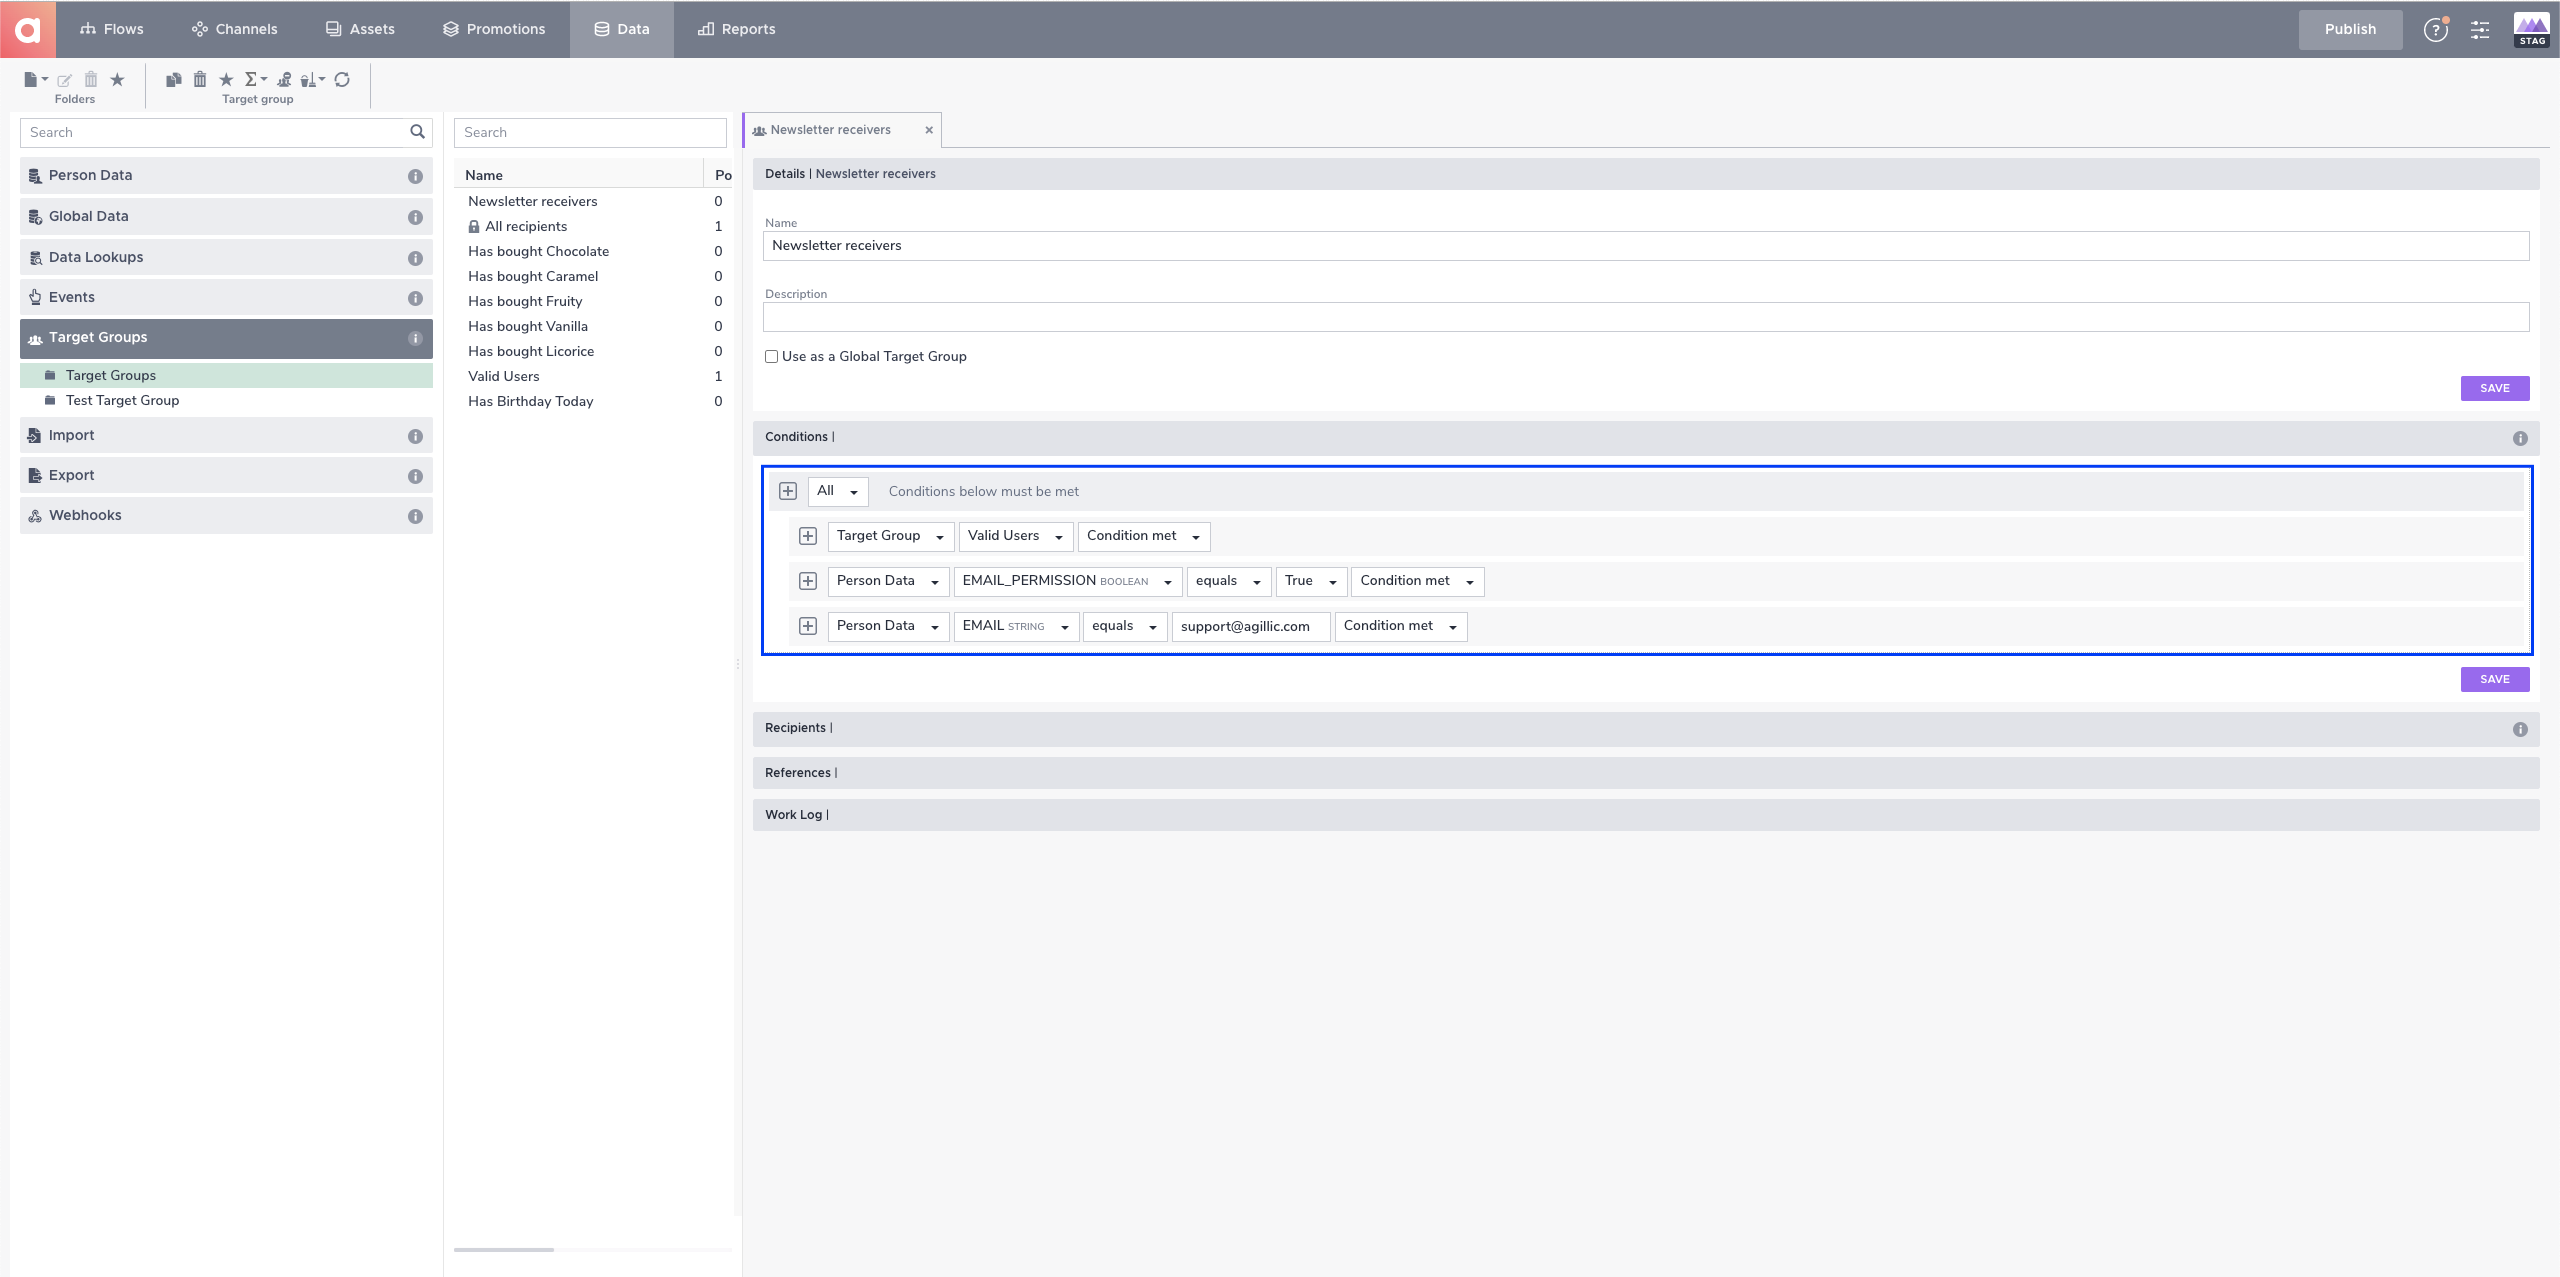
- In the Conditions panel, click on the plus icon and select 'Insert Condition'. Create the following Conditions:
- Target Group | Valid Users | Condition met
- Person Data | Email_Permissions | Equals = True
- Person Data | Email | Equals | [your email] | Condition met
- Select the 'Recipients' section to see the recipients matching these conditions. If no recipients are shown, you might not have any recipients on the instance. You can easily create recipients that match the conditions by clicking the Create Recipient button.
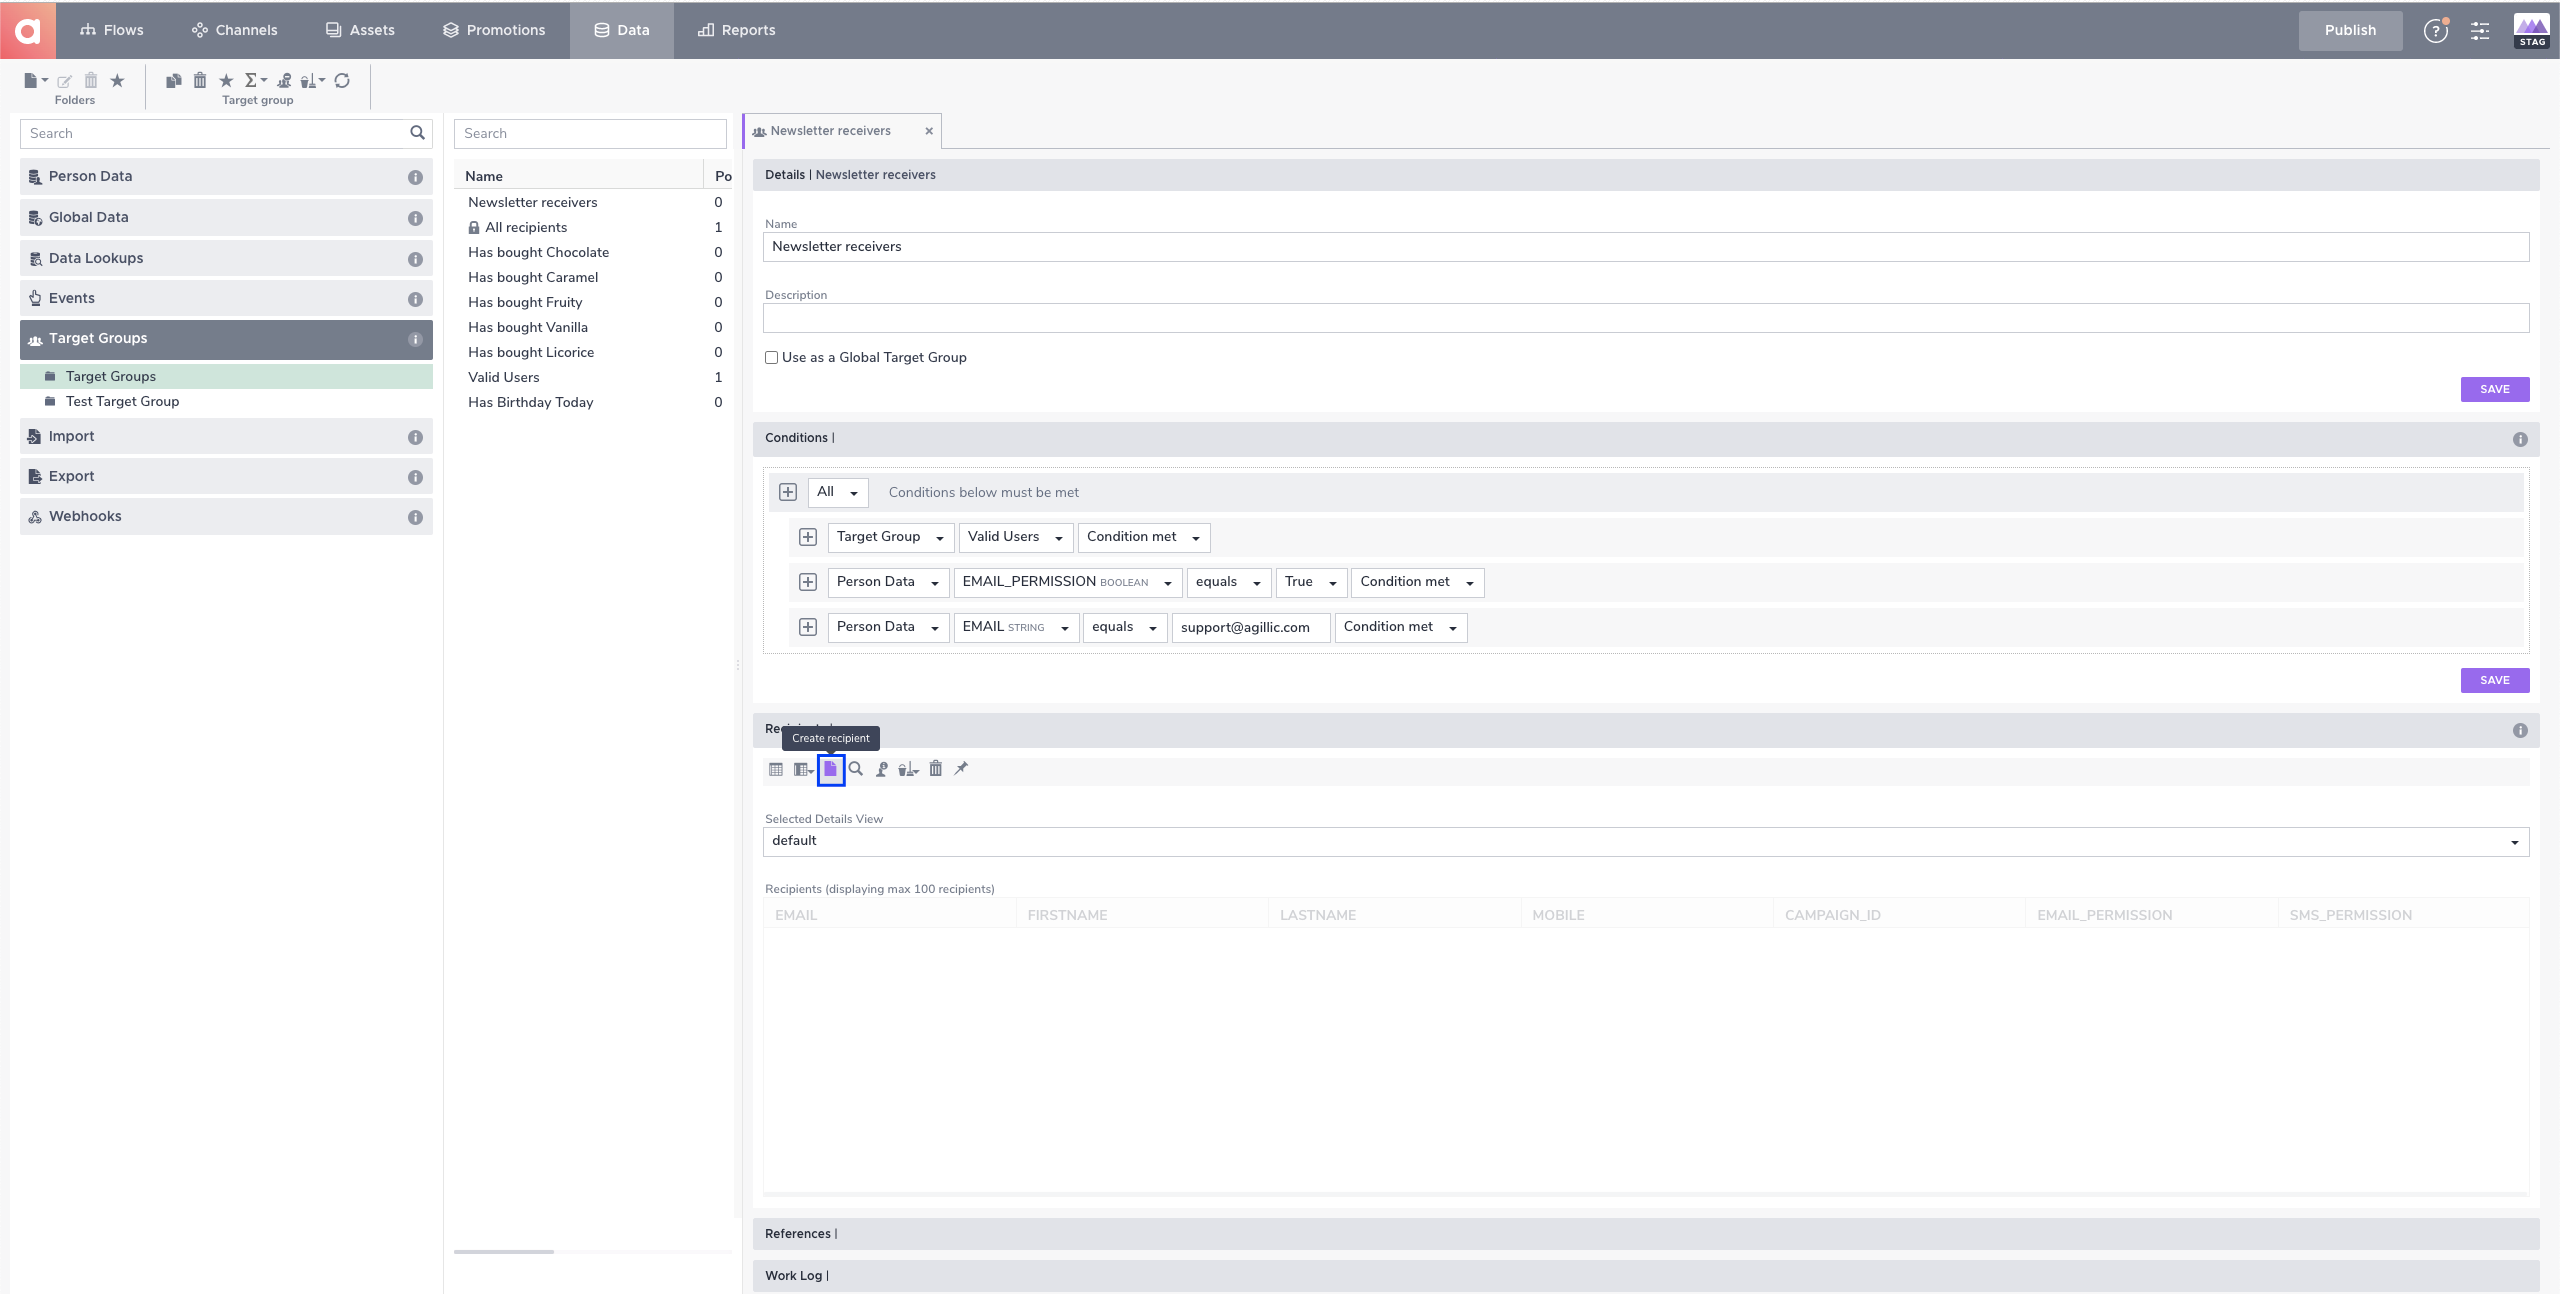
- Fill out the relevant data for the recipient. If you don't see the data fields you need, you can edit the details view that controls what fields you see. Click on the 'Selected Details View' drop-down menu and select 'Newsletter Campaign'.
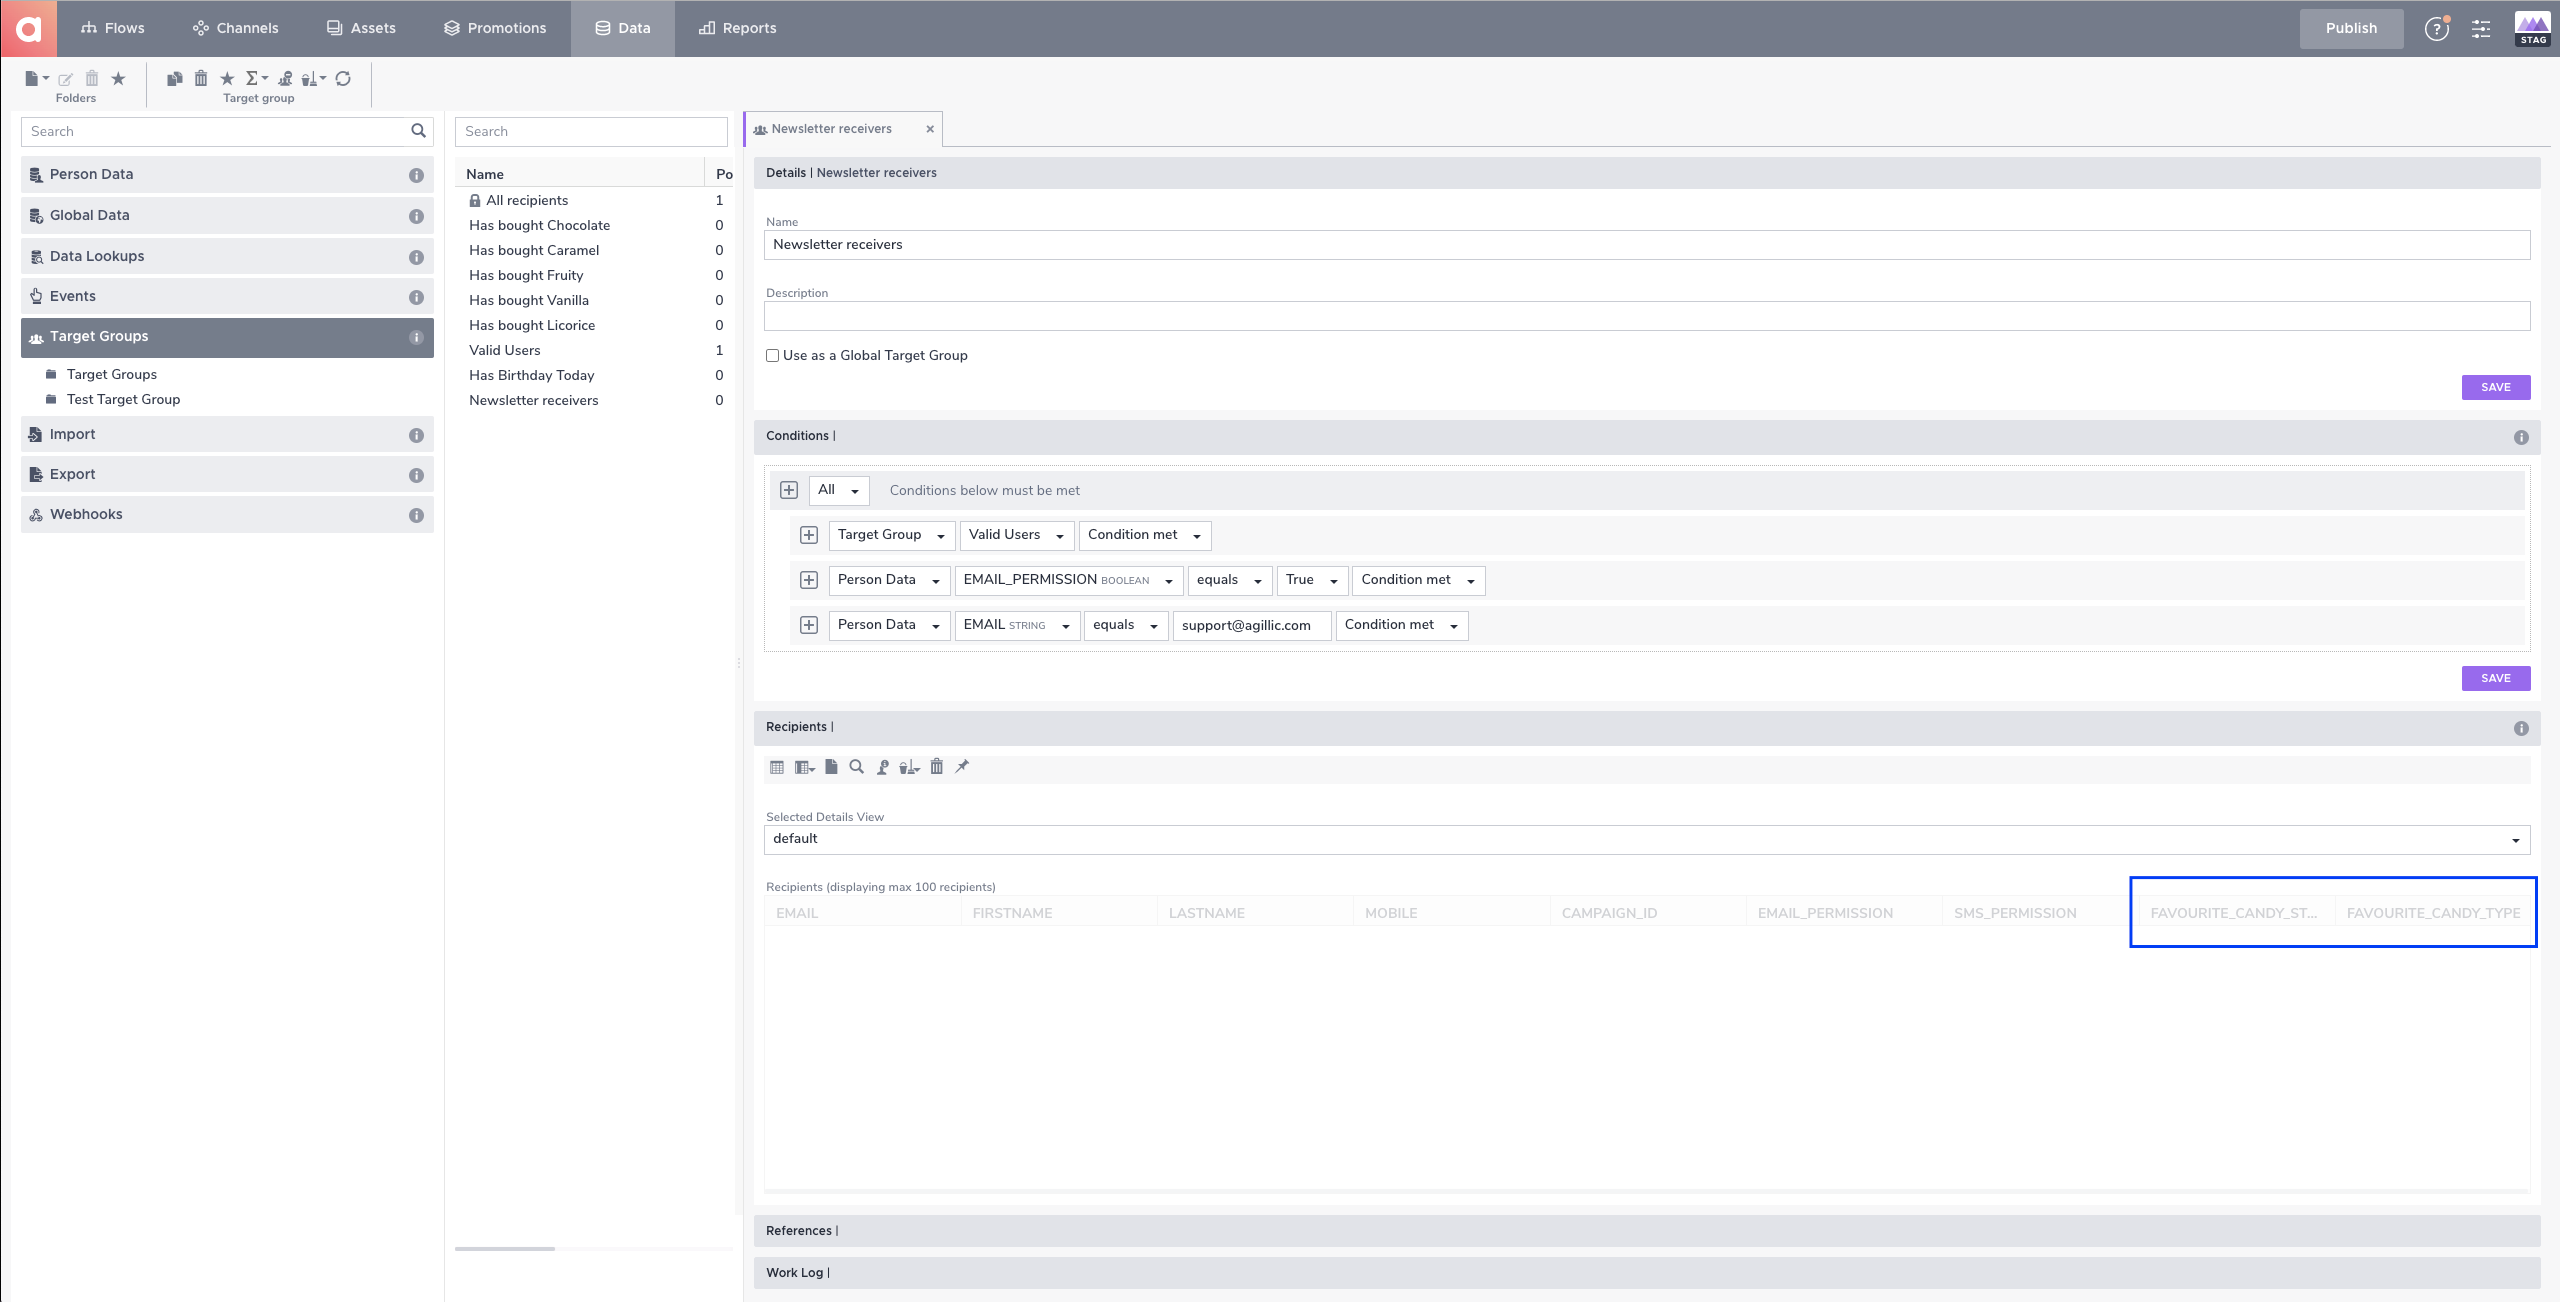
- Click on your email address and then click the 'Details' Icon in the 'Recipients' section. A pop-up will appear where you can add a different type of data to your ID.
- Click and drag the 'FAVOURITE_CANDY_TYPE' Person Data from the 'Available Data' list to the 'Selected Data' list.
- Click 'Update'.
- In the 'Recipients' section, you can now choose your favourite candy type.

How to Create a Promotion
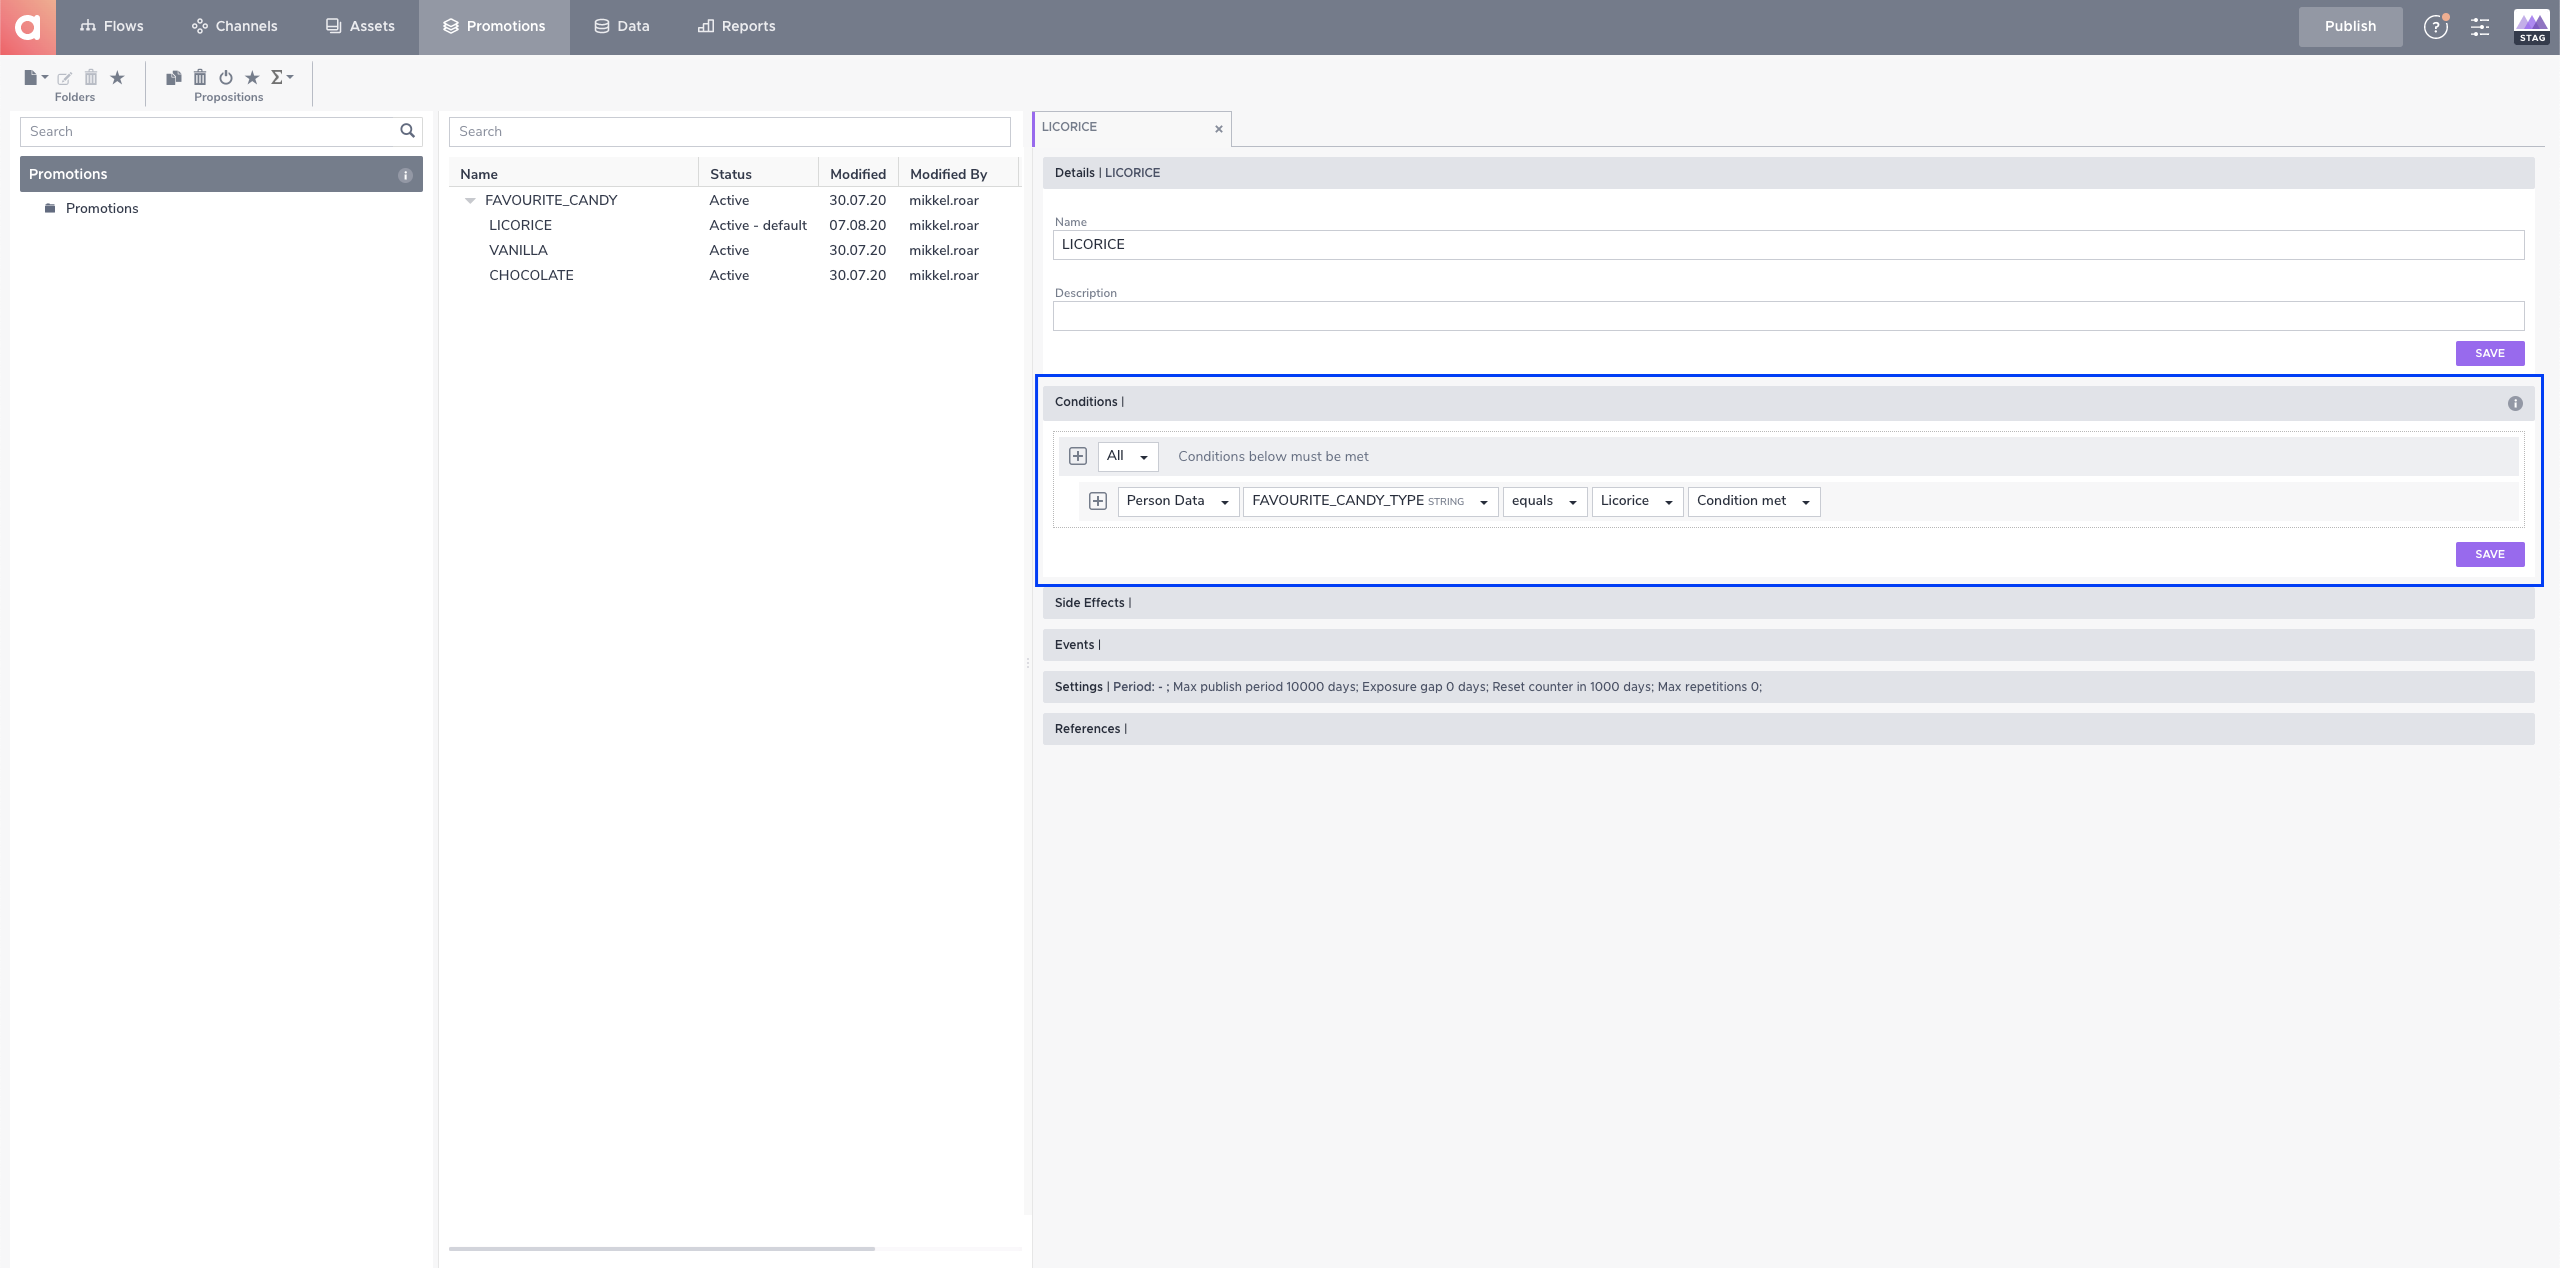
In order to personalise the Newsletter Campaign with your favourite candy type, you will need to set up a Promotion with three different Propositions - Chocolate, Licorice, and Caramel.
- Mouse-over the Promotions module and choose 'Promotion Rules'.
- Click the 'Create New Promotion' icon in the top bar and then 'New Promotion' from the dropdown.
- Fill in the name of your Promotion Candy Offer.
- Click on your Promotion in the Item Navigator.
- Click the 'Create New Proposition' icon from the top bar and then 'New Proposition' from the dropdown.
- Click the 'Duplicate' icon twice in the top bar.
- Fill in a name for your first Proposition - Chocolate.
- In the Conditions panel, click on the Arrow icon and select 'Insert Condition'. Create the following Conditions: Person Data | FAVORITE_CANDY_TYPE | equals | Chocolate.
- Do the same with the two other Propositions, but change the name to Licorice and Caramel respectively.
- Click 'Save'.
Now that you've made your Target Group and your Promotion, you will need to create your Newsletter Campaign in the Channels module.
How to Create a Newsletter Campaign
- Open the Channels module and then select 'Email'. Now, you can click on the folder you want your newsletter campaign to be saved into.
- Click 'Create email' at the bottom of the left sidebar.
- A pop-up window will appear where you can fill in the name of your email 'Newsletter 001' and then click 'OK'. The layout is set by default as the template has already been premade.
- Now, insert some text to the different Blocks in your Welcome Campaign.
- Fill in the 'Subject line', 'Sender Address', and 'Sender Name' in the right sidebar.
- Click on the 'Preheader' field in your content and fill in a piece of text.
- Click on the 'Personalise' panel in the right sidebar, as you will need to personalise this Block with your first name.
- Click on the drop-down menu and select 'FIRSTNAME'. A ${FIRSTNAME} placeholder text will be inserted. However, the actual text will follow the styling of the surrounding elements.
- Hover over a Content Block and click the 'Plus' icon. From the Block selector modal, you can select a Body Block and insert some text.
- Hover over a Content Block and click the 'Plus' icon again. This time, select the Block containing a Header, Image, and Body. Fill out with some text as well.
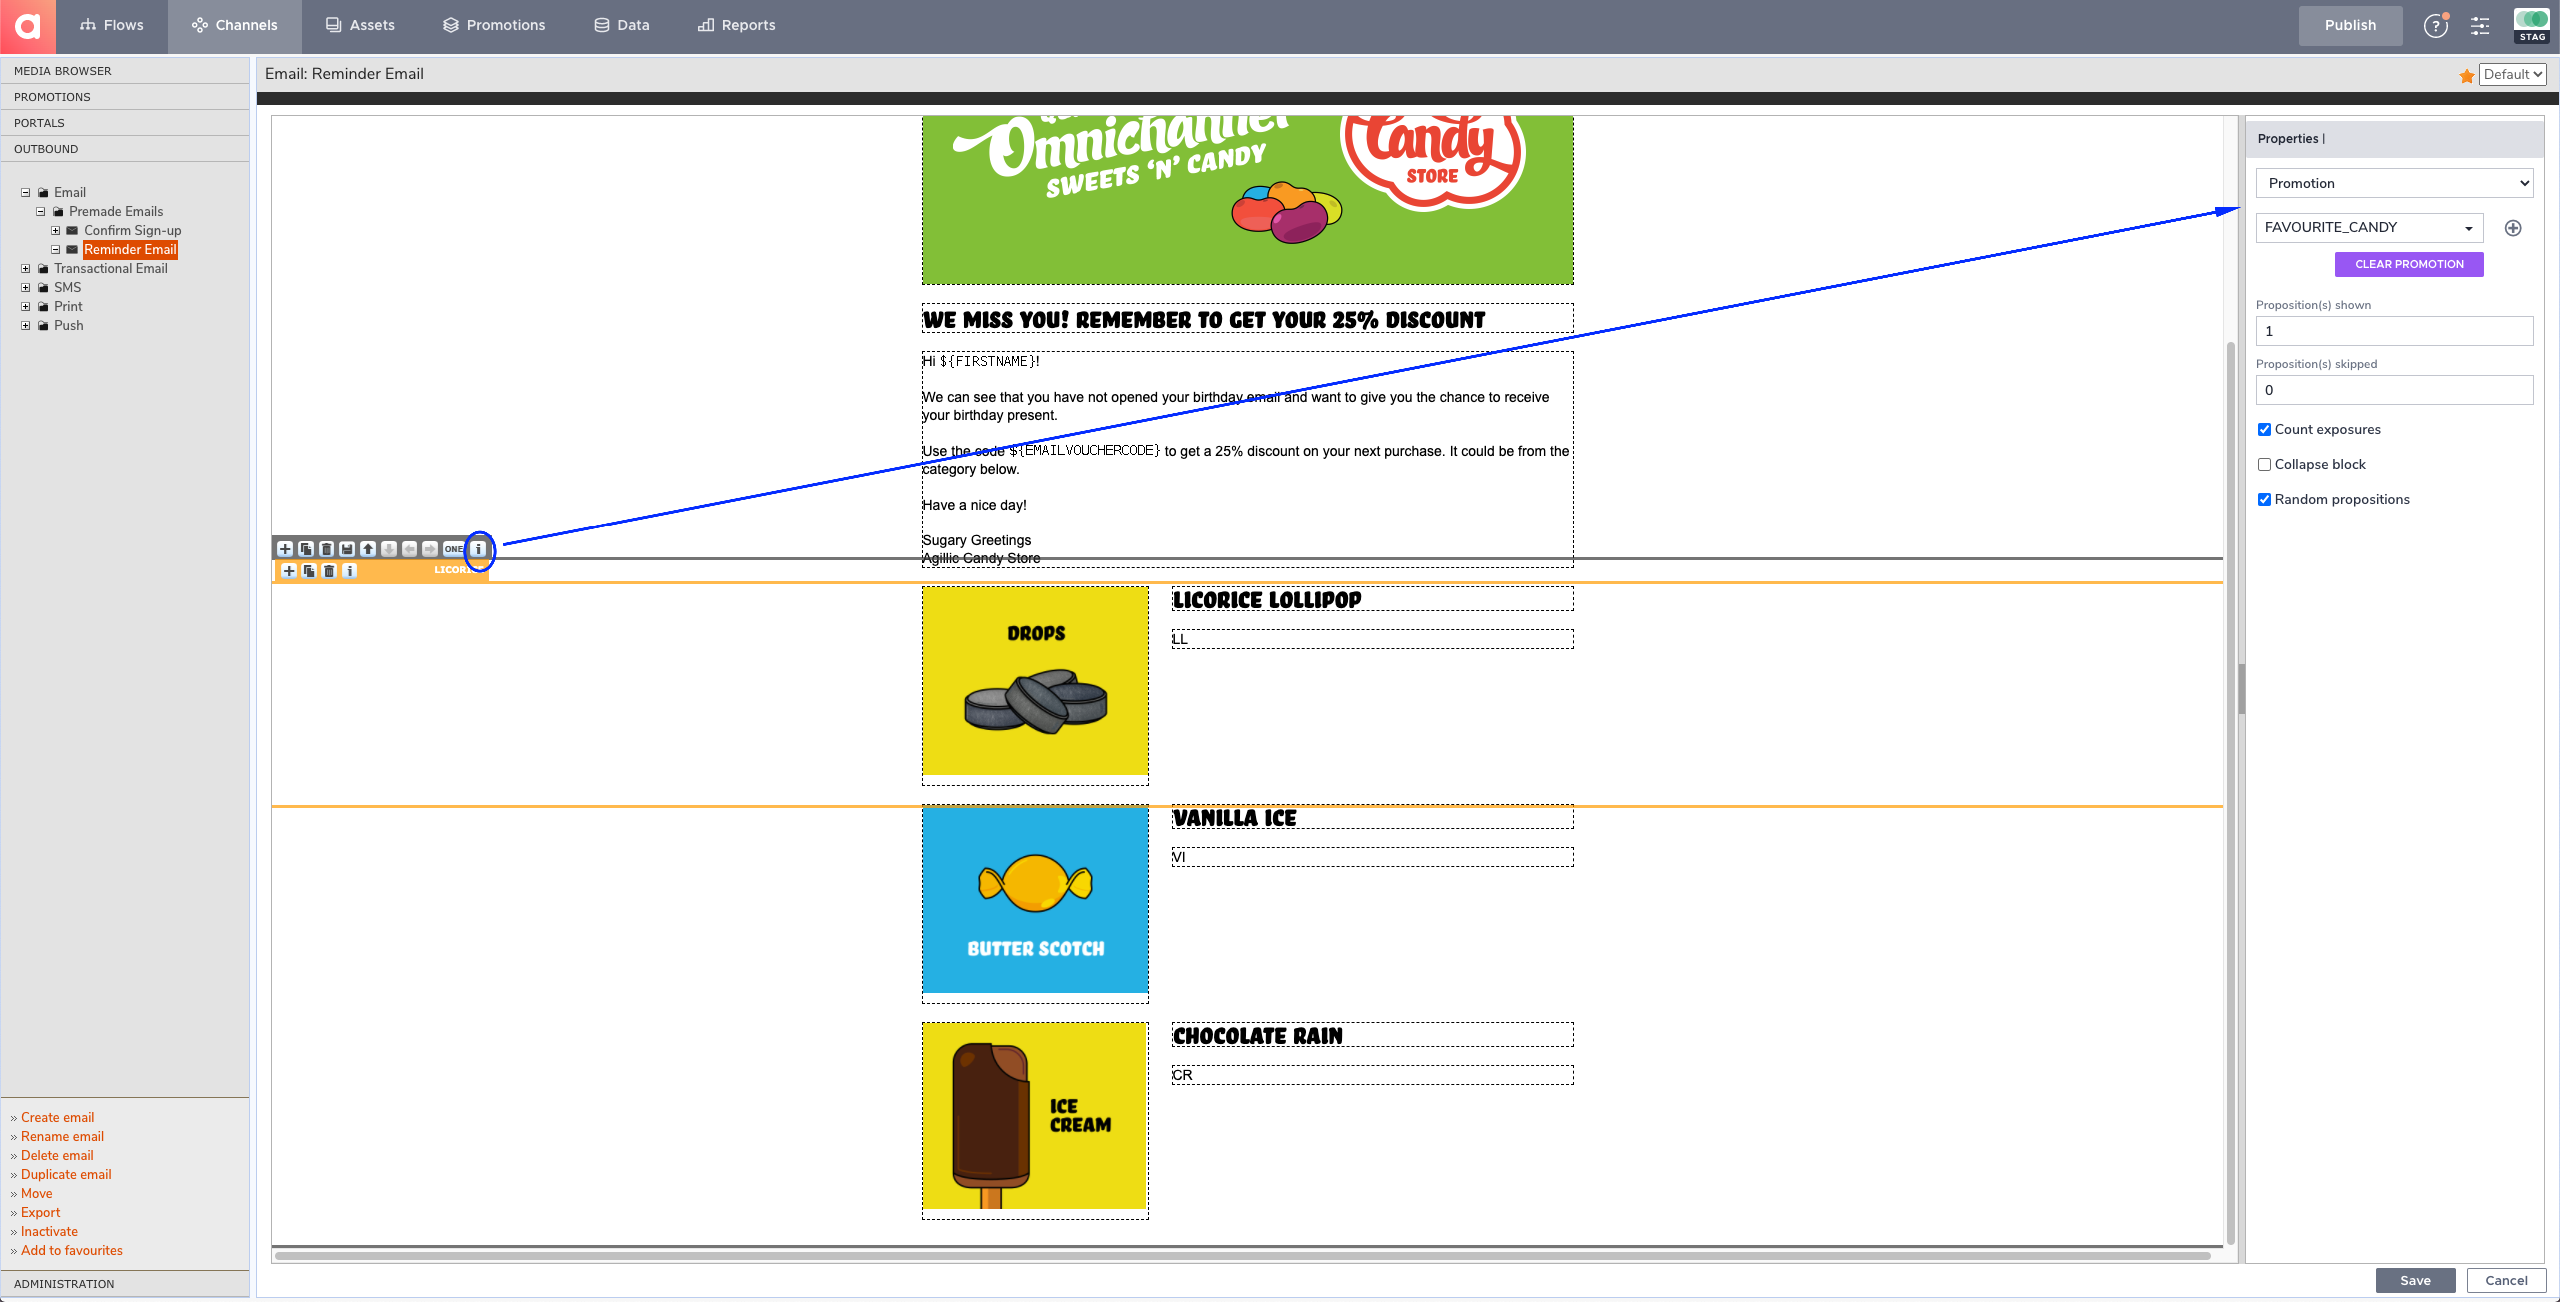
- Hover over the Content Block and select the 'i' icon. Now, in the 'Properties' section in the right sidebar, open the dropdown and change it from 'Static' to 'Promotion. The Promotion you select will be where the Block reads content and Condition rules from.
- Click 'Save'. A yellow outline will appear around the Content Block indicating it's personalised.
- Hover over the Content Block and click the 'All' Icon the Content Block toolbar. Now, you will see all three Propositions. You will need to add a Promotion Field to all three Propositions so they all show different content.
- Click the header in your personalised Content Block and select the 'Personalise' section in the right sidebar.
- Click the 'Select Promotion field', fill in 'header', and select HTML. Then, click 'Save'.
- All three headers are now blank and you can fill them out individually with text relating each content.
- Click on the body in your personalised Content Block.
- Select the 'Personalise' section in the right sidebar.
- Click the 'Select Promotion field', fill in 'body', and click 'Save'.
- All three bodies are now blank and you can fill them out individually with text.
- Click on the image in your personalised Content Block.
- Select the 'Personalise' section in the right sidebar.
- Click the 'Select Promotion field', fill in 'Image', and click 'Save'.
- All three images are now blank and you can fill them out individually with a fitting image.
- To insert an image that you've uploaded to the instance, open the 'Image' section in the right sidebar, select 'Assets' in the drop-down menu, and click the blue button 'Select Image'. A pop-up window allows you to select the image from the Assets Manager. Here, you can also upload images directly and use them in your email.
- Choose a fitting image and click 'Save'.
How to Execute your Newsletter Campaign in a Flow
Now that you've made your Newsletter Campaign, it's time to execute it in the Flows module.
- Open the Flows module.
- Click the 'Create New Flow' icon in the top bar.
- Fill in the name of your Flow 'Newsletter Summer 2020'.
- Open the 'Target Group' section in the right sidebar, click on the drop-down menu, and select your Target Group - 'Newsletter Receivers'
- Click 'Email' in the 'Add step' toolbar and fill in the name of your Step 'Send Newsletter Email'.
- In the 'Email Template' drop-down menu, select the Newsletter Campaign that you made in the Channels module 'Newsletter Receivers'
- Click 'OK'.
- Remember to click the 'Save" icon (floppy disk) in the top bar. If there's a red exclamation mark in your Flow, it indicates that the Flow isn't being saved.
- Hover over the Publish module icon in the top bar.
- Click on 'Stag'.
- Click on the 'Execute flow' in the 'Flow' toolbar, followed by 'Execute on Staging' to manually execute your flow. A pop-up window will appear. Click on 'EXECUTE FLOW'.
You will now receive your Newsletter Campaign with your favourite type of candy in your email inbox.