
Export Profiles allow you to specify where files generated in Agillic should deliver to. They come in handy in Print Steps, Export Steps, and Activity Exports.
The files you generate can send to your instance's internal WebDav Export folder, directly to a configurator's email address, or to your own external FTP/SFTP server.
In this article, you'll find information about:
How to Create an Export Profile
- Open the Data module.
- From the left sidebar, open the 'Export' section.
- Select the 'Export Profile' folder.
- Click the 'Create: New Export Profile' button.
- Select the desired destination in the drop-down. See Table 1 for explanations.
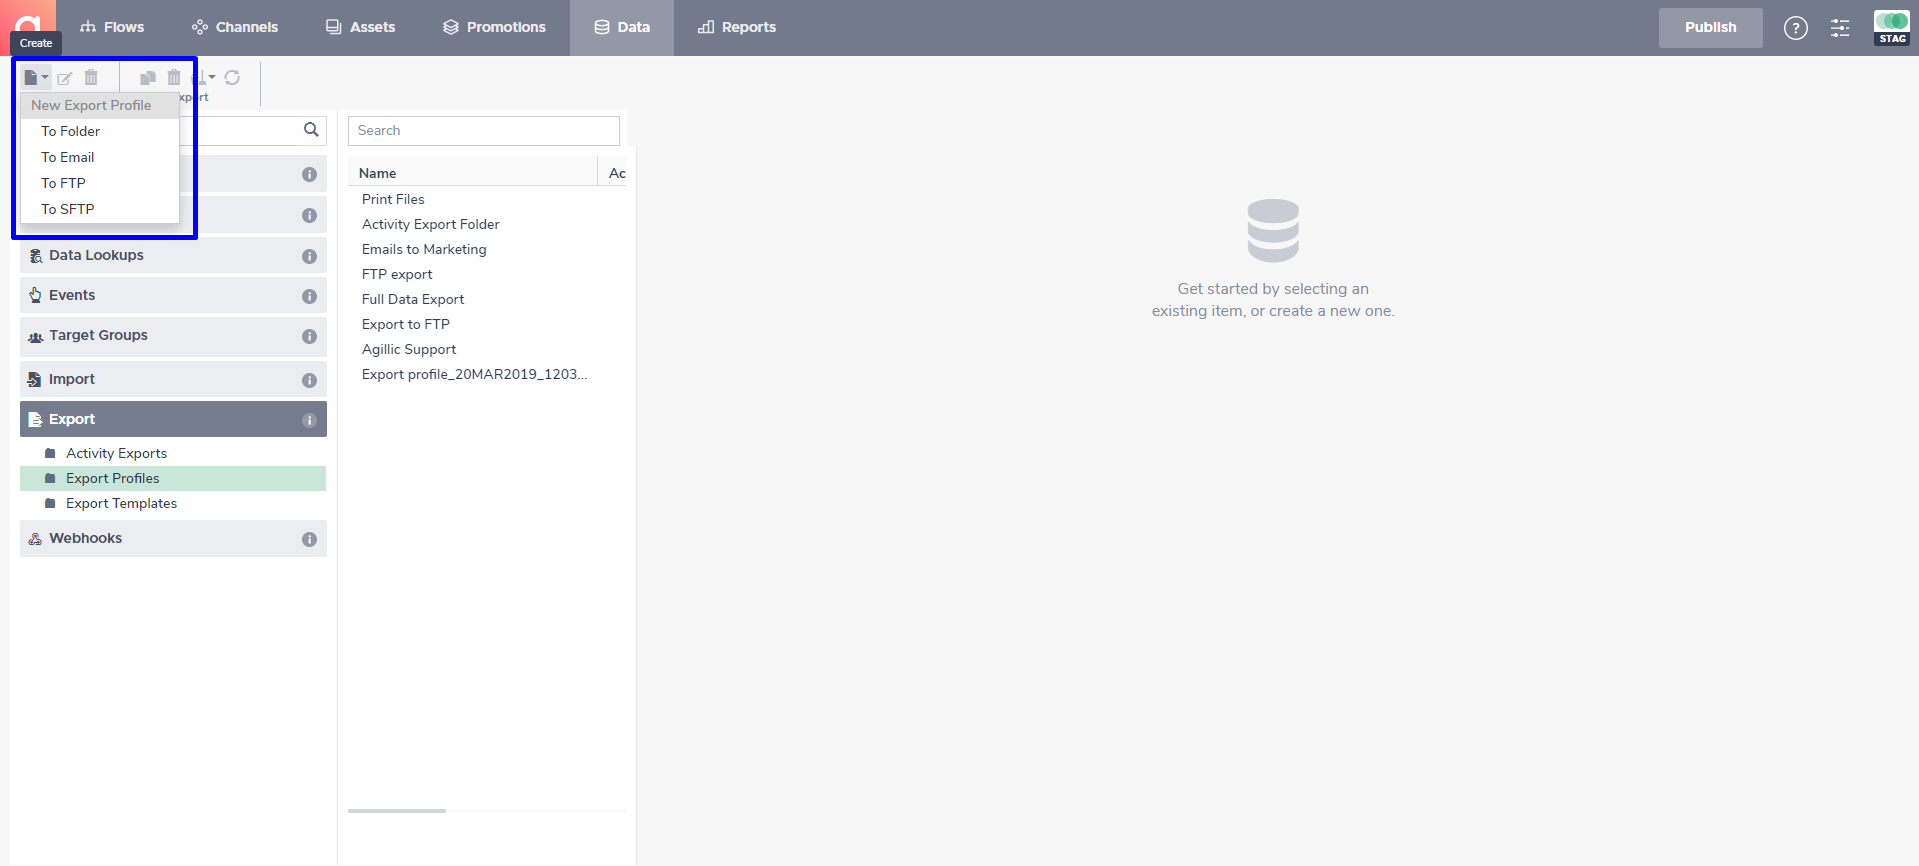
Selecting the type of export profile
| Export Profile Type | Description |
| To Folder | Will send your export file to the Export section of WebDav. Learn how to set up WebDAV here. |
| To Email |
Will send to an email address of your choice. Be aware that most email clients have a 25MB maximum file size. Therefore, for larger exports, this method doesn't work. |
| To SFTP / To FTP | Will send the files to external servers, to folder structures defined in the 'Remote directory' field. You can test the connection in the profile's settings. |
Go to the 'How to' guide corresponding to the destination you chose. All steps mentioned are required to make the Export Profile work.
How to Create a 'To Folder' Export Profile
- Fill in the name of the Export Profile in the 'Name' field.
- Fill in the name of a folder to put your file in the 'Folder' field.
- Click 'Save'.

An Export Profile 'To folder' called 'Full Data Export' set up to export files to the 'Full_Export' folder
How to Create an 'SFTP or FTP' Export Profile
- Fill in the name of the Export Profile in the 'Name' field.
- Fill in the name of the folder to put your file in the 'Folder' field. The path can't begin with '/' as we restrict access to the root folder. The folder will be placed in the Export WebDav Folder.
- Fill in the host in the 'Host' field.
- Fill in the User Name for the server in the 'User name' field.
- Fill in the Password for the server in the 'Password' field.
- Fill in the port number for the server in the 'Port Number' field.
- Fill in the root directory of the server in the 'Remote directory' field. The value must start with the '/' character, to denote your root directory.
- Click 'Save'.
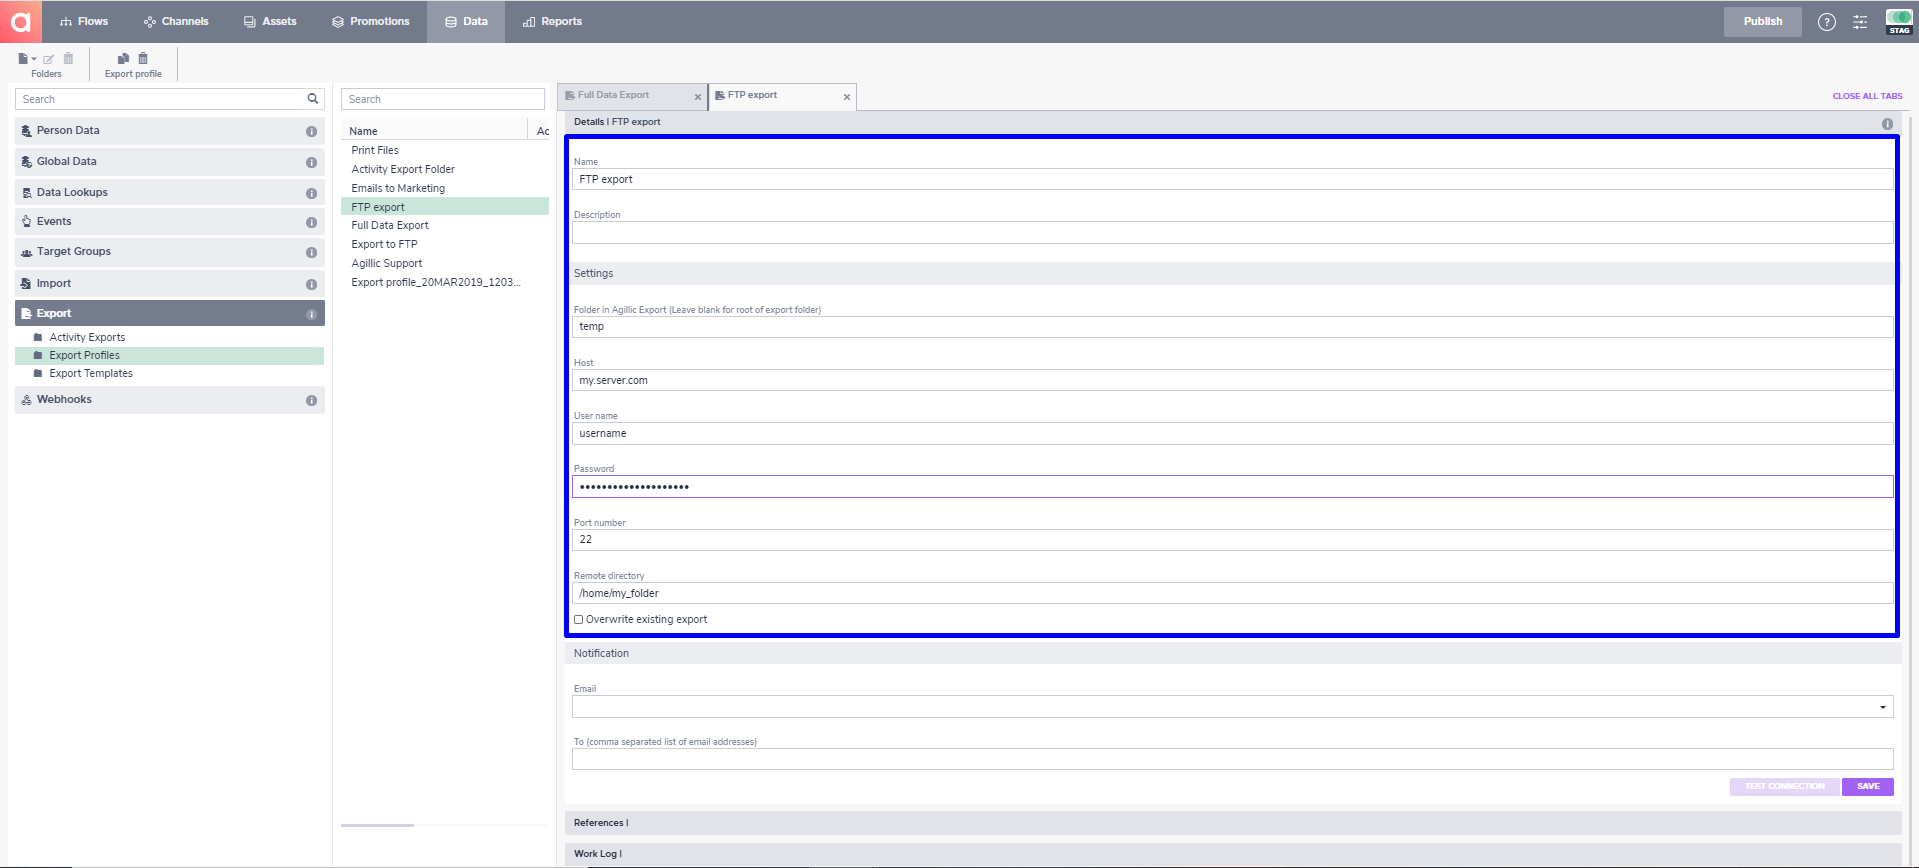
An Export Profile 'To FTP' called 'FTP export' set up to export files to the '/home/my_folder' folder on the server
How to Create an Email Export Profile
- Fill in the name of the Export Profile in the 'Name' field.
- Select an email to send your email within the 'Email' drop-down.
- Fill in the email address(es) to send the export to in the 'To' field.
- Click 'Save'.
Some email clients have a limit on how big files may be to be received in the inbox. Therefore, it isn't recommended to use this export profile if the possibility of the file being too big is there
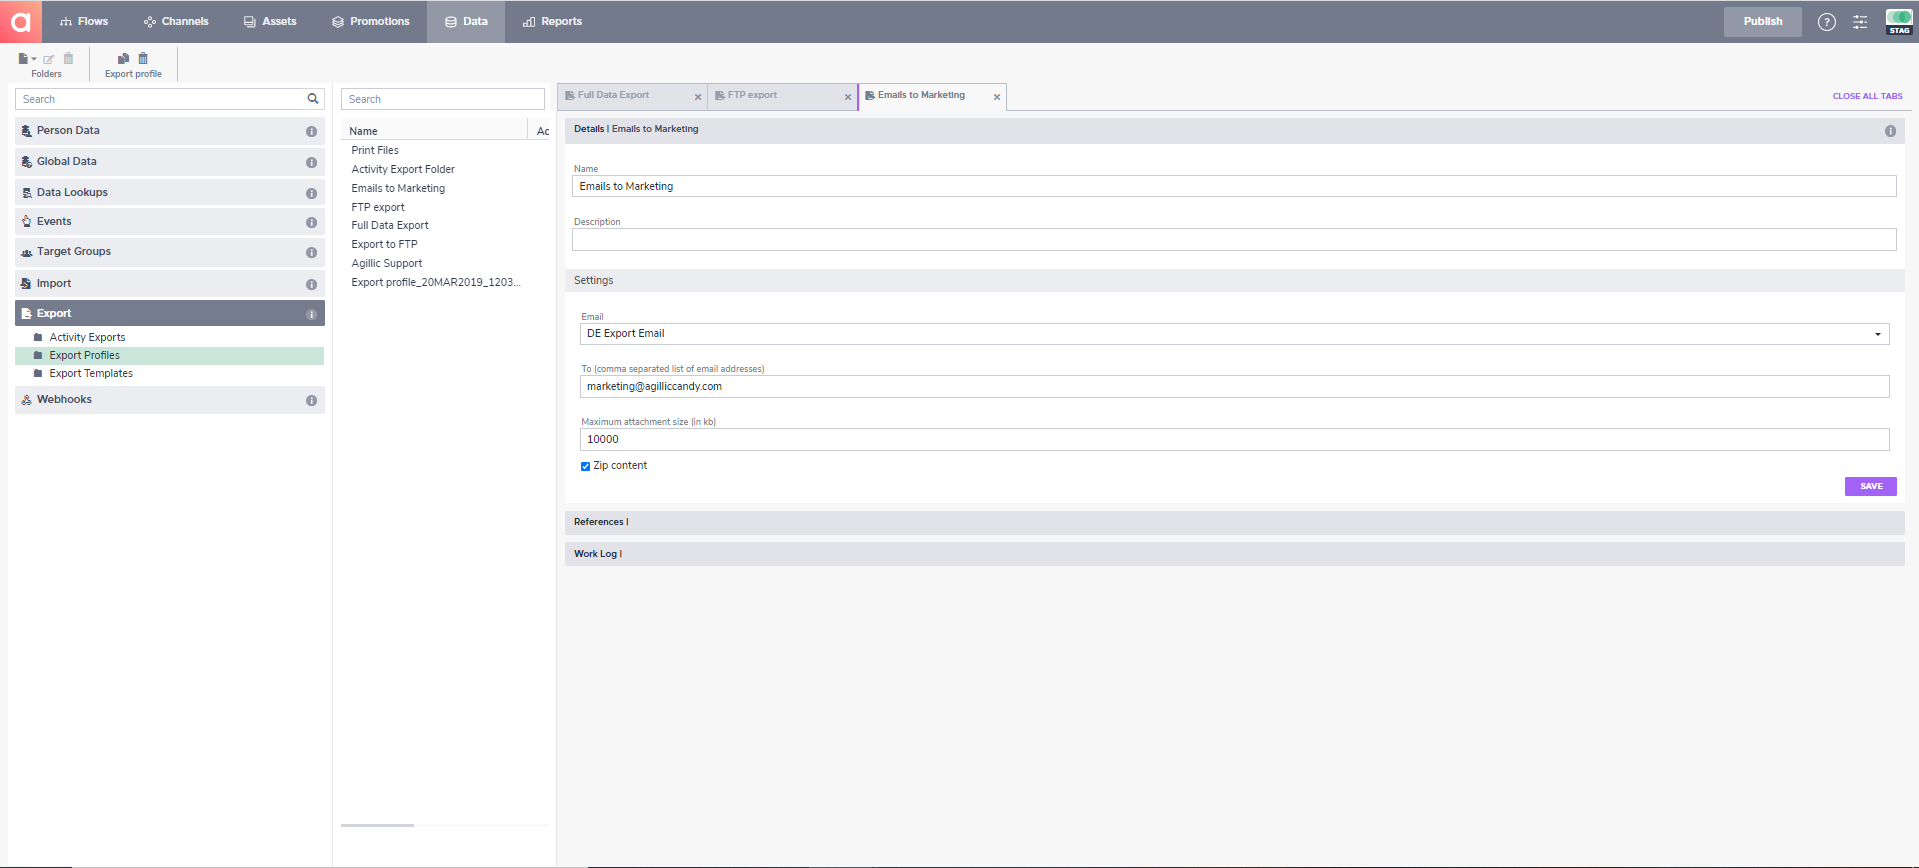
An Export Profile 'To Email' called 'Emails to Marketing' which sends an export to the email address 'Marketing@Agilliccandy.com using the email 'DE Export Email'