
A details view determines which data you're able to see when working in the recipient overview in a Target Group. Creating one or more details views makes it easier for you to investigate your recipients' data. This could be useful if you'd like to investigate the Person Data in your Target Group and compare the data directly in Agillic.
You can use a details view in different parts of the interface once you have created it:
It's recommended to create multiple minor details views with less than ten data fields to make it easier to locate the information you need.
You can add the following types of data to a details view:
Details views on staging and production are kept separate, so publishing changes done to views on staging will not affect the same view on production.
In this article, you'll find information about:
- How to Create a Details View
- Adding and Removing Data Fields to the Details View
- How to Select a Details View
- Seeing One-to-Many Data in a Details View
An Example of a Details View in Agillic
How to Create a Details View
- Log in to Staging.
- Open the Data module.
- Select 'Target Groups' from the left sidebar.
- Open the 'Target Group' folder, also from the left sidebar.
- Navigate to a Target Group.
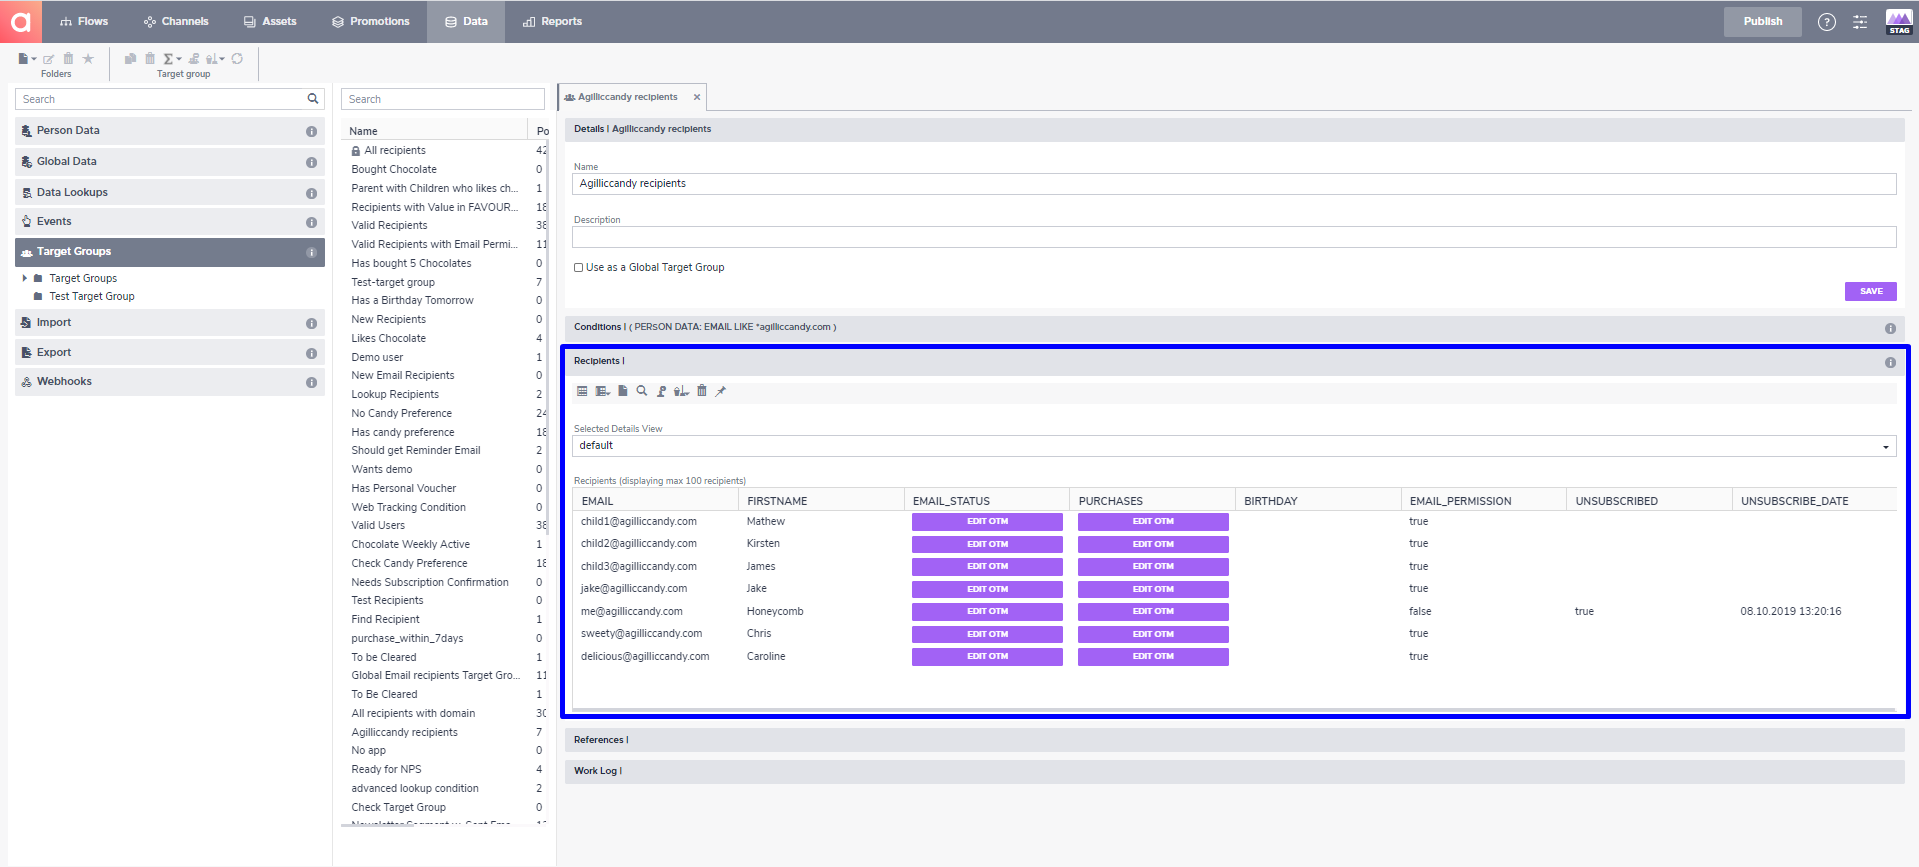
- Select the 'Recipients' subsection to fold out the recipients' overview.
- Select the 'Details' icon in the 'Recipients' toolbar. It's the first icon on the left.
- A pop-up will appear with the 'Details' view. Click on the drop-down menu in the top-right area.
- Fill in the name of your new details view in the top-right drop-down. For example, this might be 'personalised details view'.
- Click on the 'Plus' icon.
Now, you've created a new details view and it's ready to have data selected for the view.
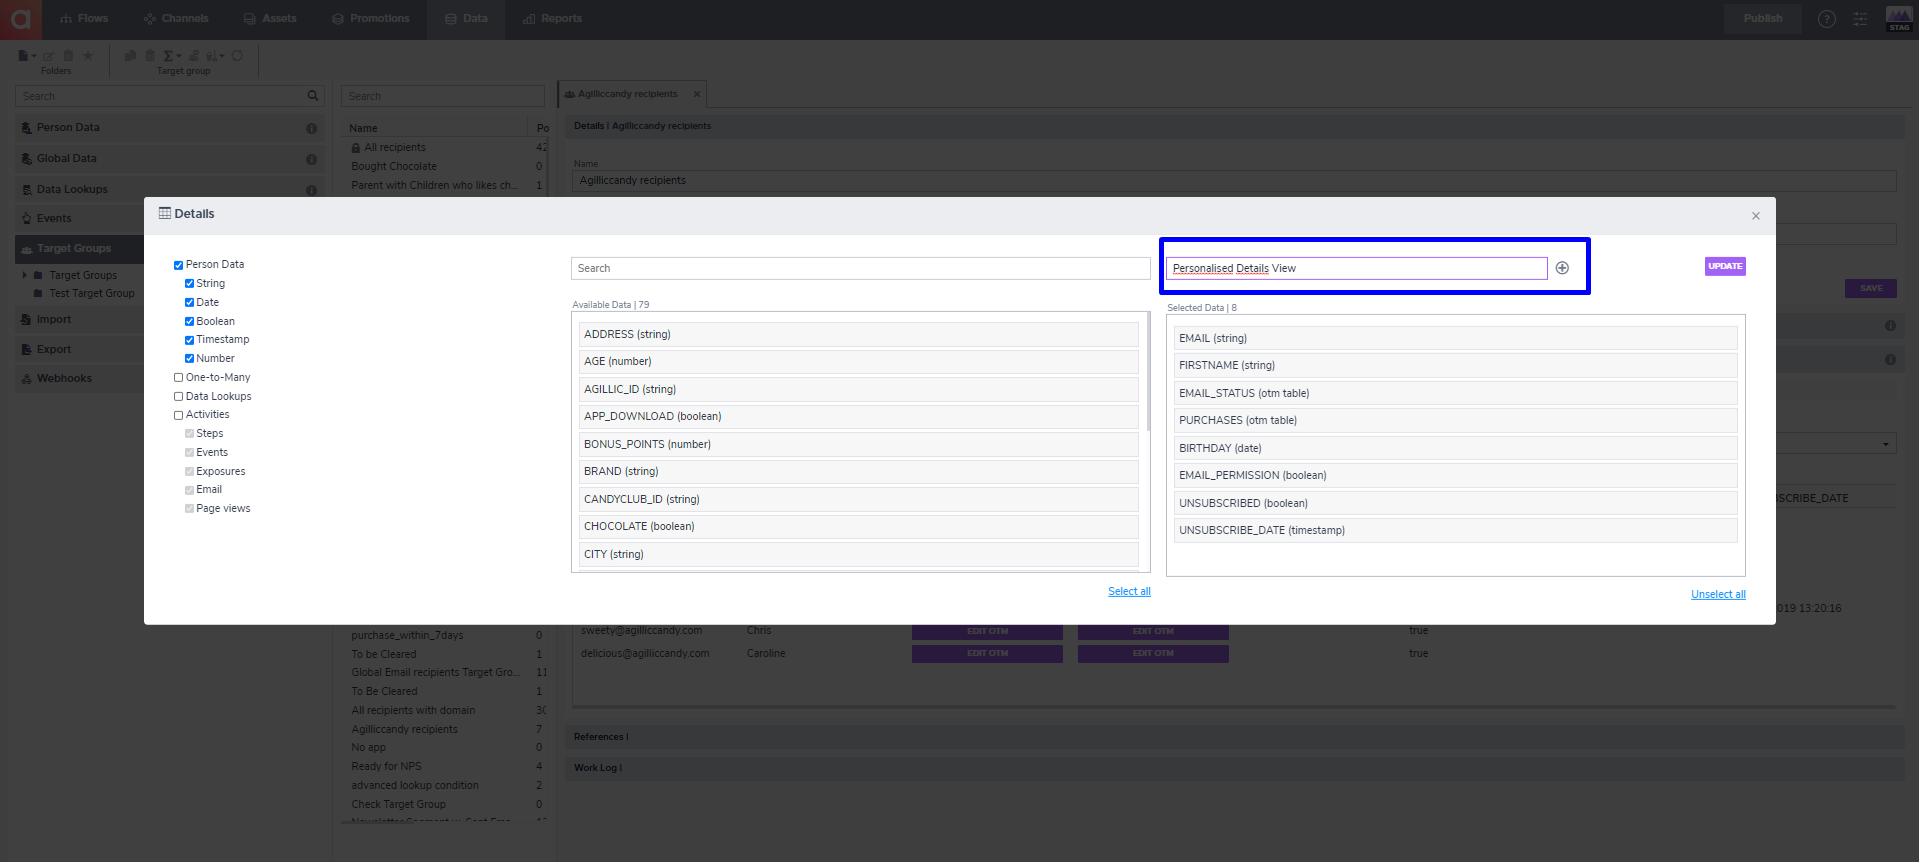
Adding a new details view called 'Permission'
Adding and Removing Data Fields to the Details view
If you'd like to add or remove data fields from your details view, follow the instructions laid out below.
How to Remove a Shown Data Field from a Details View
- If you want to remove all data fields but the recipient ID, click the 'Clear' link in the lower right corner.
- If you only want to change select data fields, click and drag a data field from the 'Selected Data' list to the 'Available Data' list.
How to Add a Person Data to a Details View
- Fill in a search term in the 'Search' field.
- Click and drag the wanted data field from the 'Available Data' list to the Selected Data' list.
How to Add a One-to-Many Table, Data Lookup, or Activity to a Details View
- Check the type of data field in the right sidebar.
- Fill in a search term in the 'Search' field.
- Click and drag the data fields you want to add from the 'Available Data' list to the 'Selected Data' list.
One-to-Many Tables and Data Lookup will appear as a purple 'View records' button in the recipient table. Clicking the button will present a pop-up table where you can see the full list of entries for the recipient.
The activity shows as the counter for each activity for the recipient.
Save the Details View
- Click the 'Update' button.
Your Details View is now updated with the new list of data fields.
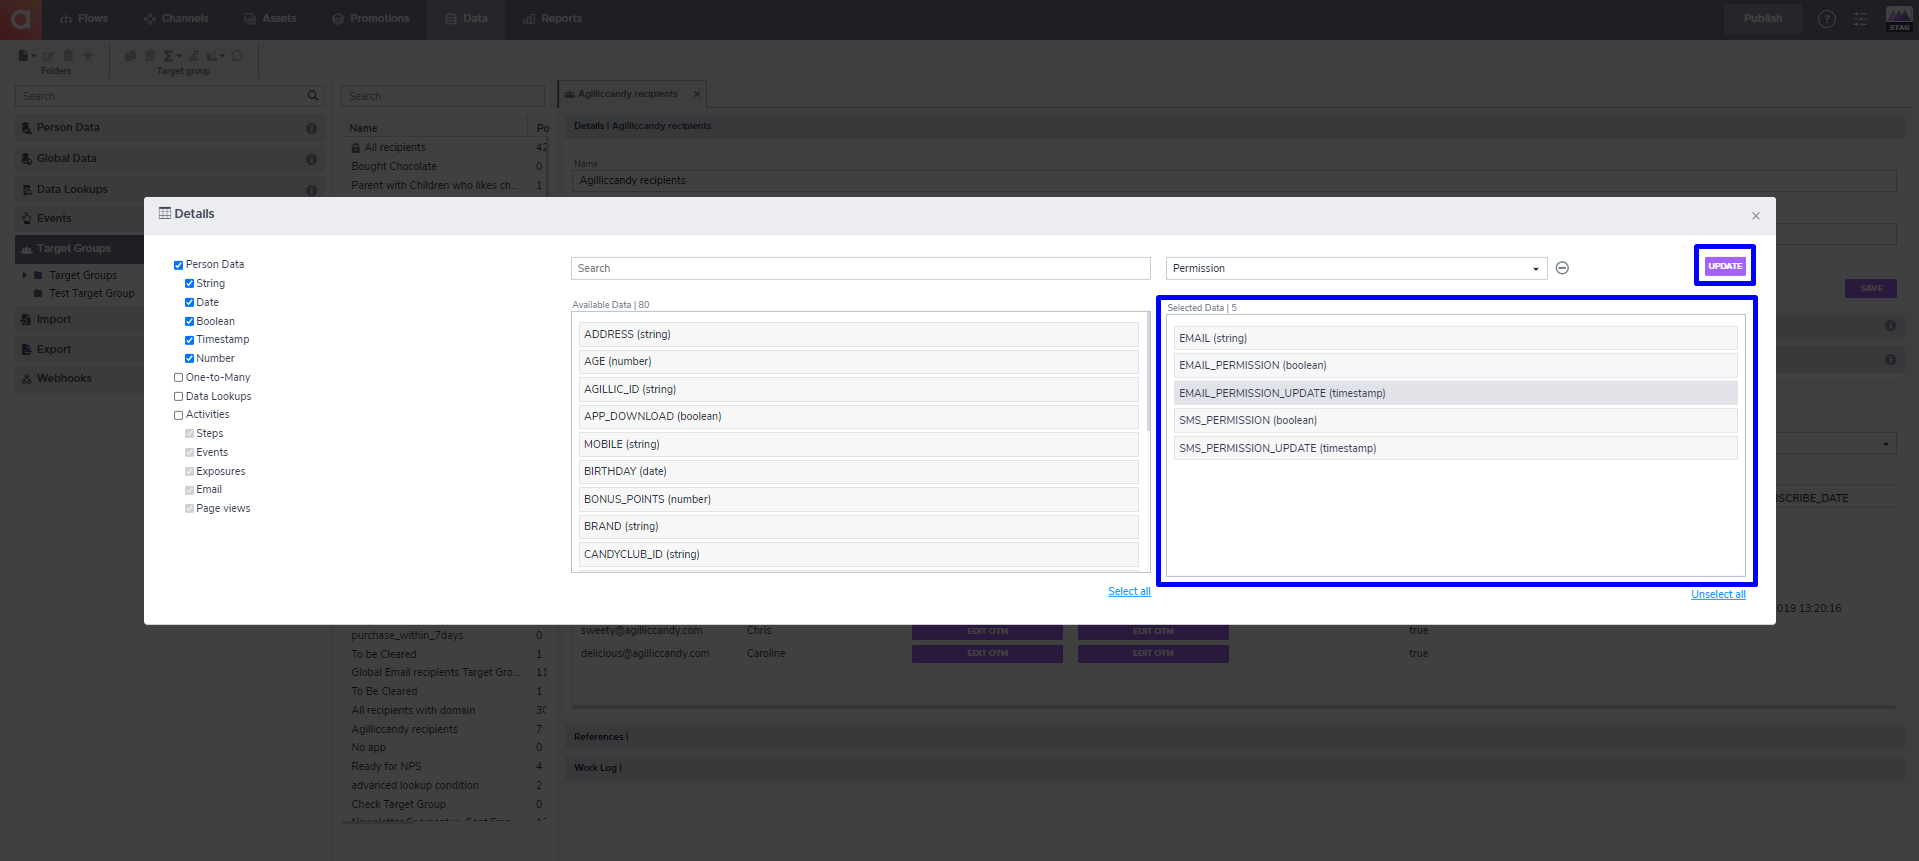
A 'Permission' details view including four different permission data fields as well as the recipients' email address
How to Select a Details View
- Log in to Staging.
- Open the Data module.
- Select 'Target Groups' from the left sidebar.
- Open the 'Target Groups' folder, also from the left sidebar.
- Navigate to a Target Group and open it.
- Click on the 'Recipients' subsection to see the recipients.
- Select the details view you want to use from the 'Selected Details View' drop-down.
The recipient table will update and show the defined data fields for the recipients.

Selecting a new details view to use in the recipient table
Seeing One-to-Many Data in a Details View
- Select a details view with a One-to-Many Table added to it.
- Click the purple 'Edit OTM' button.
A One-to-Many Table pop-up will appear where you can see all the One-to-Many records for the recipient.

The One-to-Many table pop-up showing three One-to-Many records for a recipient