
Target Groups are collections of recipients who have shared characteristics. You create Target Groups by setting rules, or what we call Conditions. The Conditions dynamically filter which recipients should belong to each Target Group.
Target Groups are useful in a number of ways in Agillic. Their main use is determining which recipients receive each of your outbound communications.
This article will go through the following:
- What a Target Group is in Agillic
- Global Target Groups
- Static Target Groups
- Control Target Groups
- Test Target Groups
- How to Delete a Target Group
- How to Calculate the Population of a Target Group
What a Target Group is in Agillic
A Target Group is set up with a series of Conditions that determine which recipients should be included.
There are three basic types of Target Groups in Agillic. They are:
- Standard Target Groups
- Static Target Groups
- Global Target Groups
Standard Target Groups are dynamic, meaning the recipients included change if a Recipient's data changes. For example, a Target Group could be configured to include all recipients created within the past 24 hours.
On the other hand, a Static Target Group is static. This means the list of recipients included in the Static Target Group won't change, even if their data changes.
Global Target Groups allow you to add further, general Conditions to your Target Groups. For example, you might use a Global Target Group to find the recipients with valid emails in a preexisting Target Group you want to use. You can make a Target Group into a Global Target Group when creating or editing a Target Group.
When setting up a manually executed Flow or a scheduled Flow, you will specify which Target Group you want to send you a communication to.
You can read more about conditions and how to set them up in the following article: All you need to know about Conditions.
How to Create a Target Group
- Open the Data module.
- Open the Target Group section from the left sidebar.
- Navigate to the folder where you want to create your new Target Group. You can create a new folder if you want by clicking the Create icon in the top toolbar.
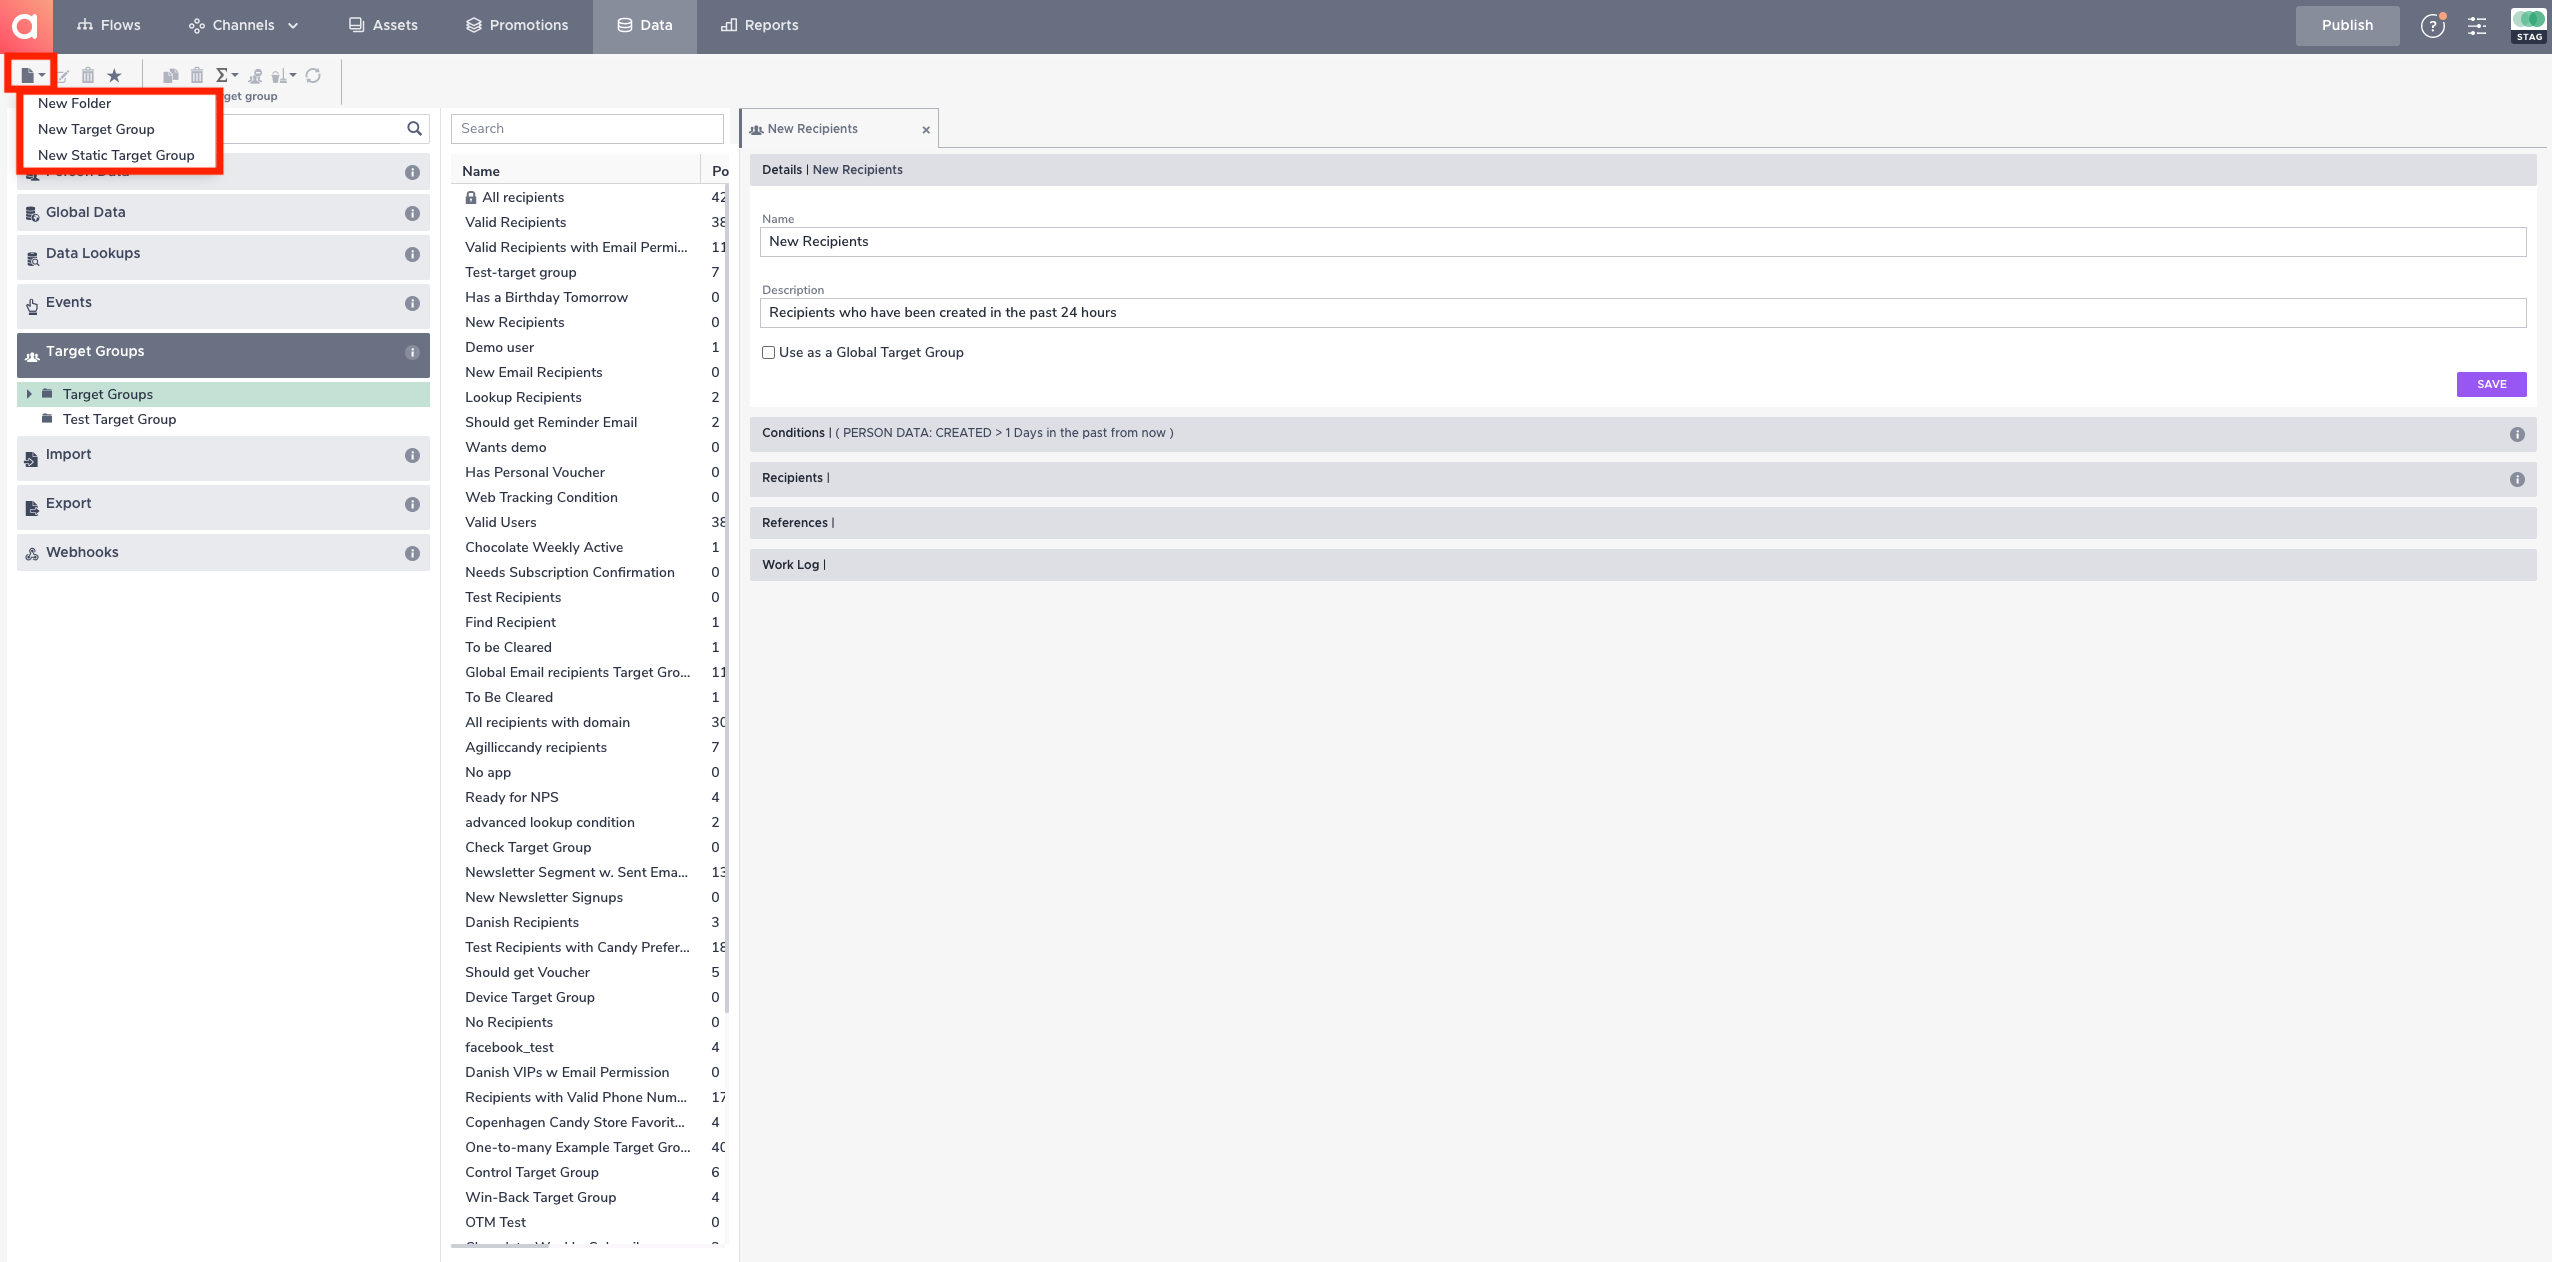
- Select 'New Target Group'.
Creating a new Target Group in the 'Data' module
- Fill in a name for your Target Group in the 'Name' field.
- Optional: Fill in a description for your Target Group.
- Click 'Save'.
Your Target Group is now ready to have Conditions added, which will set the criteria for which recipients will be included in your Target Group. You can learn how to create conditions for a Target Group here.
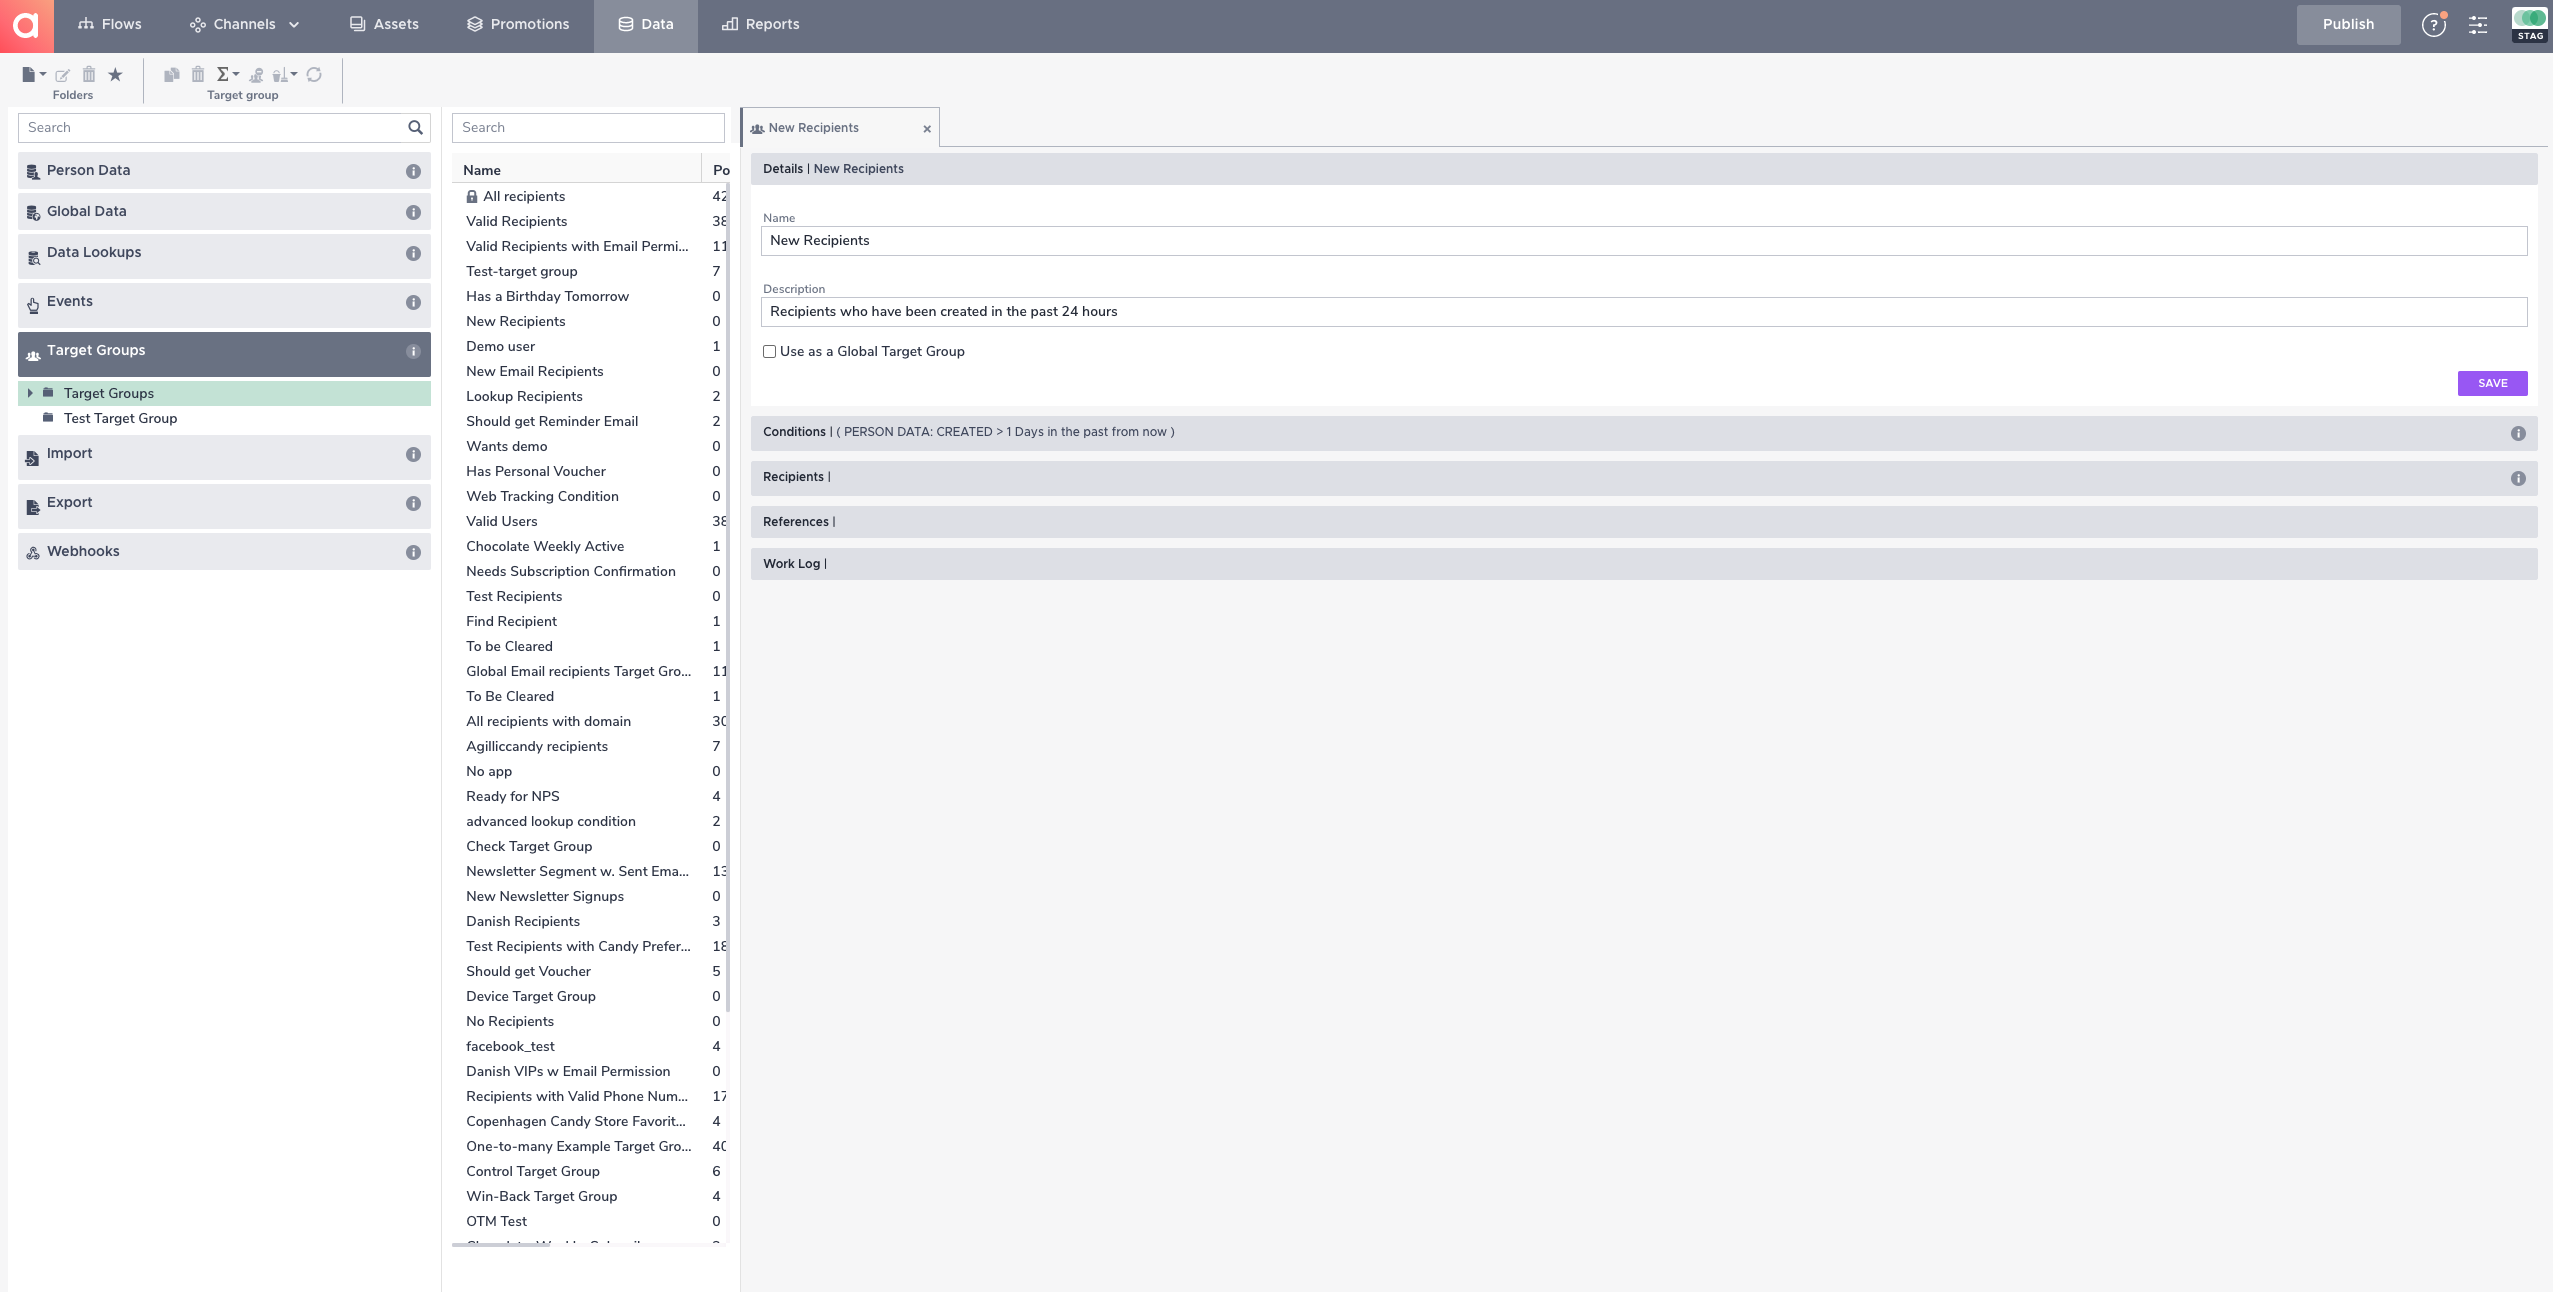
A Target Group named 'New Recipients' that's ready to have Conditions added
Global Target Groups
A Global Target Group is similar to a standard Target Group in many ways. With a Global Target Group, you can set up a series of Conditions to locate a specific segment of recipients from your database in Agillic.
The Global Target Group differs from standard Target Groups when it's used in a Flow. When setting up a Flow, you can choose to use both a standard Target Group and a Global Target Group to determine which recipients should enter the Flow. The Global Target Group allows you to set a series of broad Conditions in a single Global Target Group, rather than having to reuse the same conditions in each standard Target Group.
An example of a Global Target Group would be to check for valid email recipients by setting the correct conditions in the Target Group. In a Flow, you could add this Global Target Group, as well as a standard Target Group to check for something more specific, like which city the recipient lives in.
How to Create a Global Target Group
A Global Target Group is similar to a Target Group in terms of how you set it up and add Conditions. The Global Target Group differs from standard Target Groups when used in a Flow. When creating a Flow, you can choose to use both a standard Target Group and a Global Target Group to locate which Recipients should enter the Flow.
- Log in to Staging if you're not already logged in.
- Create a New Target Group.
- Check the 'Use as Global Target Group' checkbox under the Details section.
- Click 'Save'.
- Add Conditions to your Target Group
- Click 'Save'.
- Publish to Production to go live with your change.
You've now created and configured your Global Target Group and can use it in a Flow.

A Global Target Group for valid Recipients with email permission
How to Add a Target Group to a Flow
Often, you have to add a Target Group to a Flow to make it function. This decides which of your Recipients will enter the Flow.
- Log in to Staging environment if you're not already logged in.
- Open the Flows module.
- Create a new Flow or navigate to an existing Flow.
- Double-click on the Flow name to open it. The Flow will open in a new tab and appear in the work area to the right.
- Click on the Target Group section on the right side of the screen.
- Select your Target Group from the 'Select Target Group' drop-down. Check the 'Global Target Group' checkbox if you want to use a Global Target Group as well.
- Click 'OK'.
- Click 'Save' in the Flow toolbar.
- Publish to Production to go live with your change.
Your Target Group has now been saved and added to your Flow.

A new Flow with the Target Group 'New Email Recipients' added.
Static Target Groups
Unlike a standard Target Group, a Static Target Group doesn't have any Conditions. Instead, a Static Target Group consists of a static list of recipients.
Static Target Groups are helpful when you need to send to a segment based on a static list and the Recipients don't have any data in common. They can also be helpful when you need to refer to a list of Recipients which you know won't change. An example of this could be if you want to create a target group, based on specific recipient ID's, that already exists in Agillic. If you import the list of recipient ID's to a Static Target Group, Agillic will match the recipient ID's with the ones existing in Agillic, so you can see all data on those recipients in your Static Target Group.
Note: if you import recipient ID's that do not exist in Agillic, you will create a new recipient.
You can recognize a Static Target Group by the pin icon next to its name.
How to Create a Static Target Groups
- Log into the Staging environment.
- Open the Data module.
- Open the Target Group section in the left sidebar.
- Navigate to the folder where you want to create your new Static Target Group.
- Click the 'Create' icon in the top toolbar.
- Select 'New Static Target Group'. Your Static Target Group will be opened in the work area to the right.
- Fill in a name for the Static Target Group in the 'Name' field.
- Optional: Fill in a description in the 'Description'.
- Click 'Save'.
Your Static Target Group is ready to have recipients added. It will automatically show up on your Production environment.
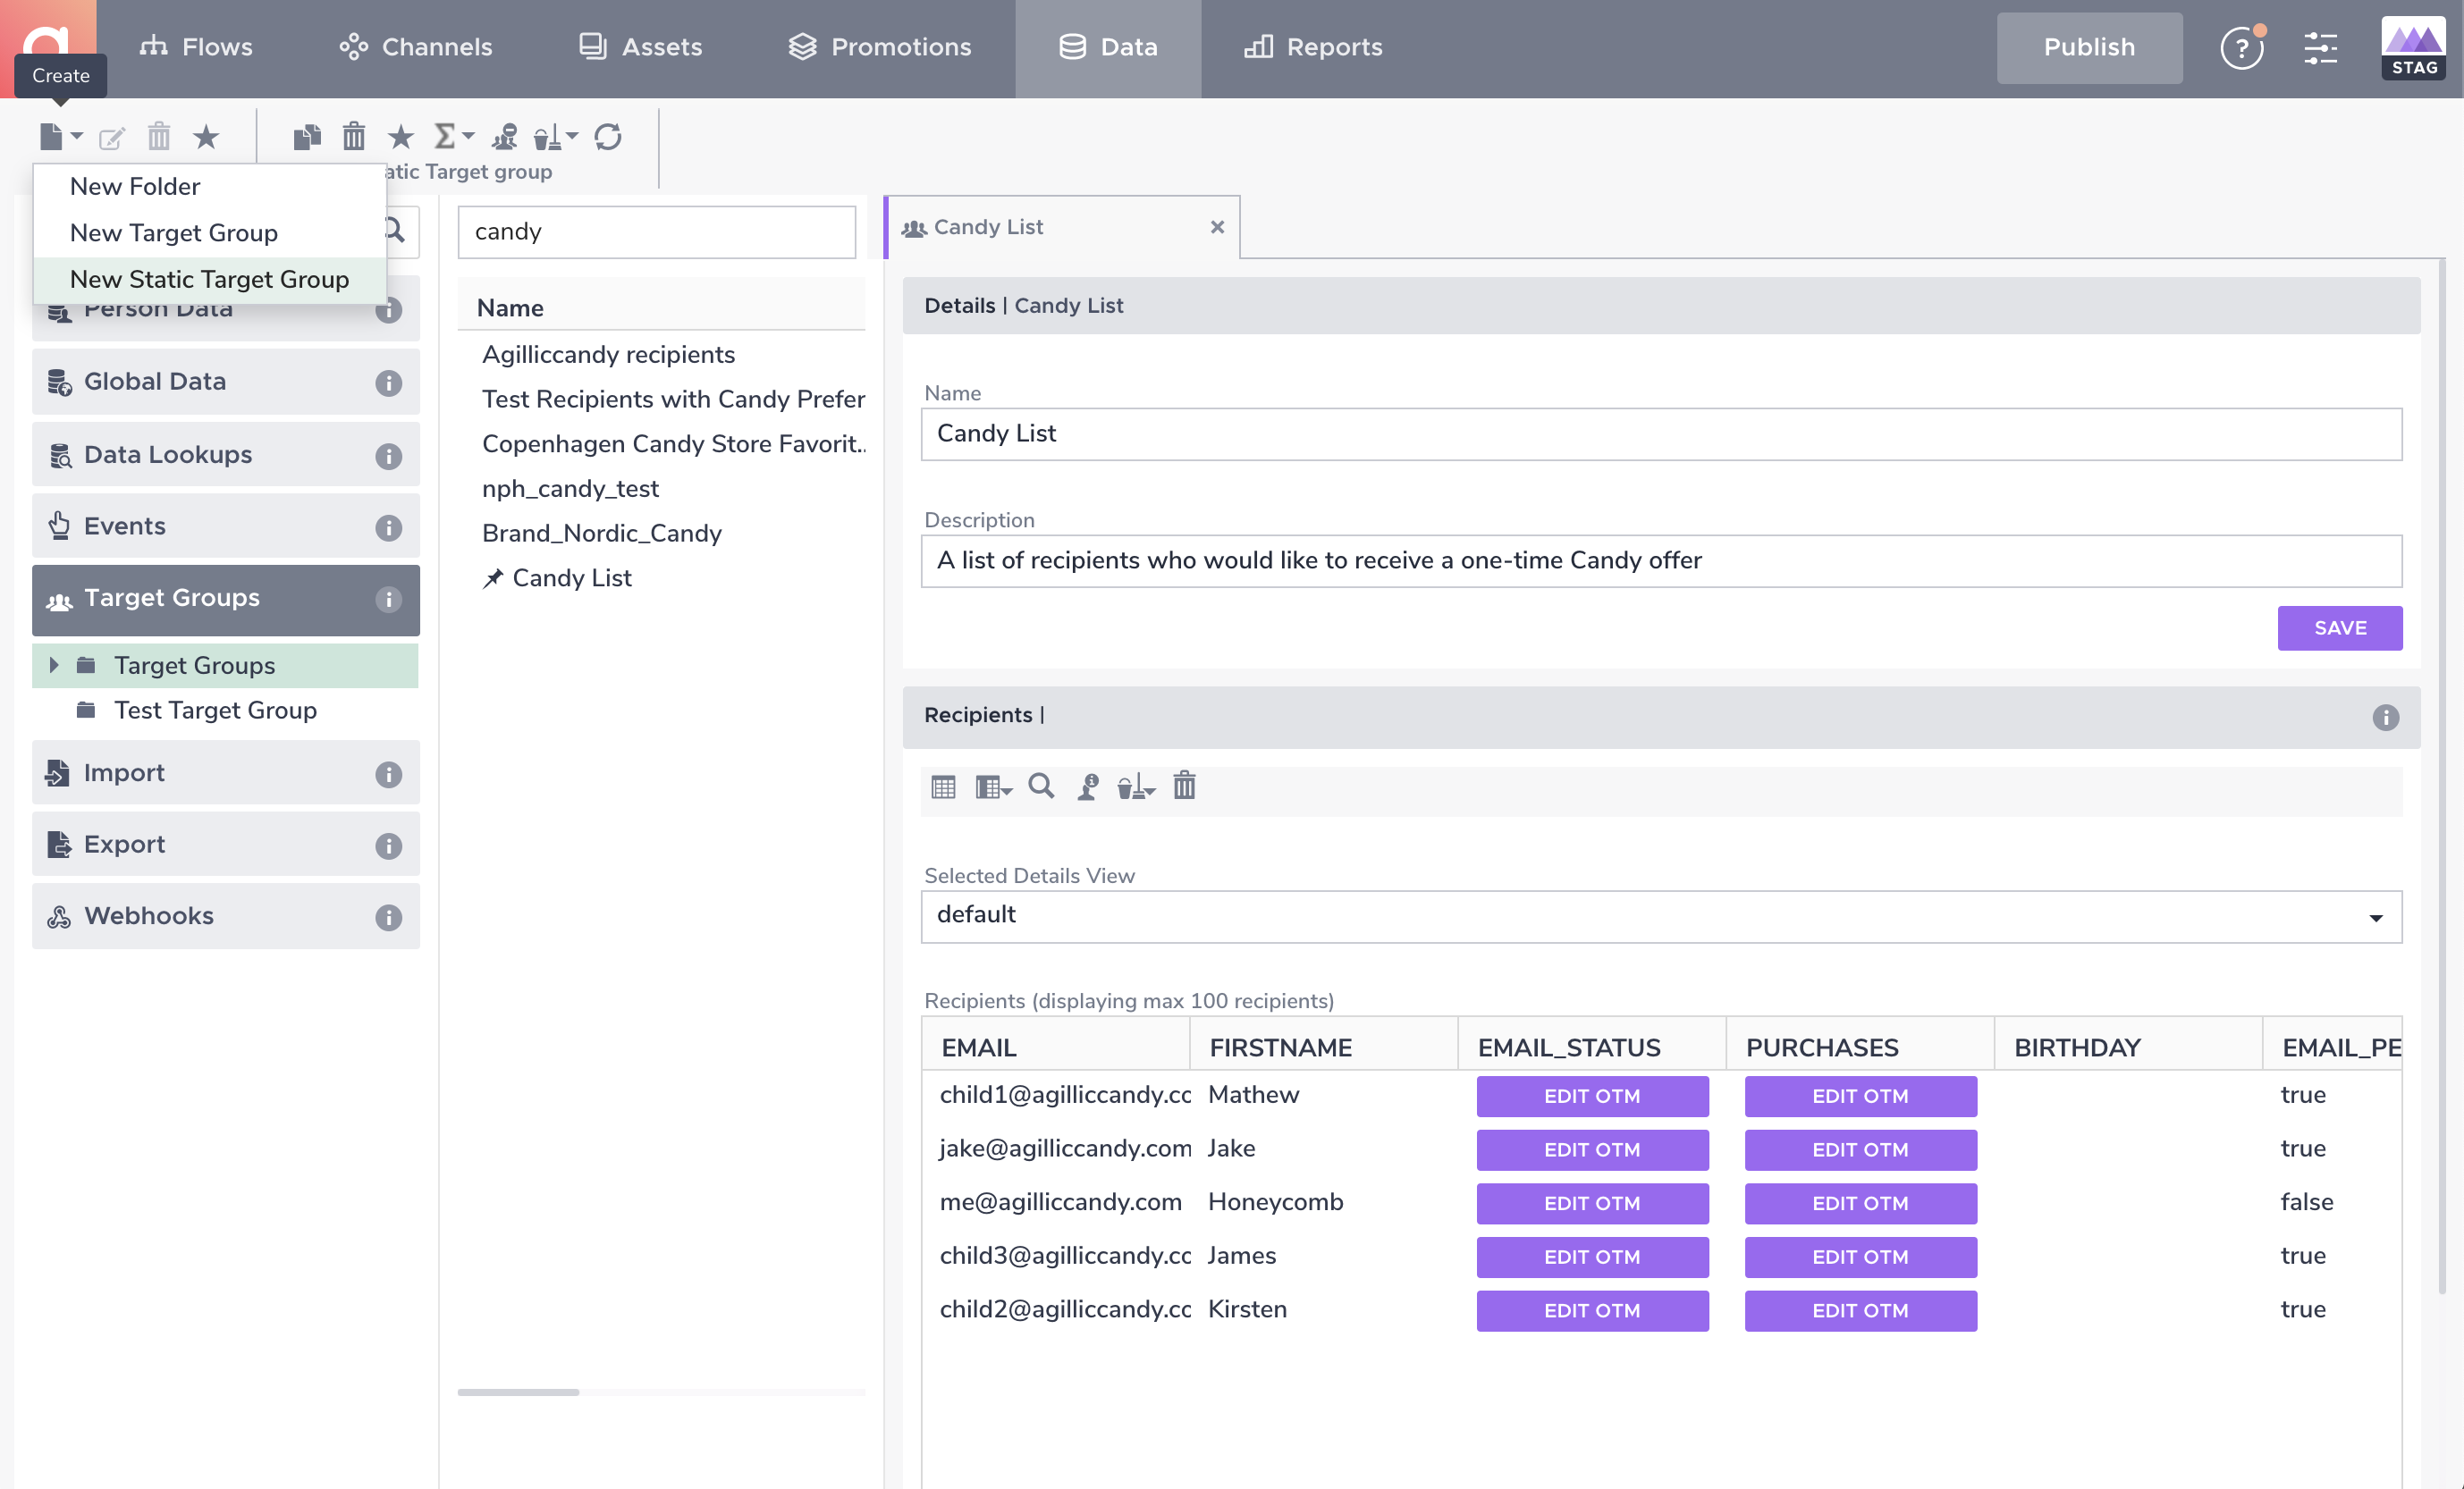
A new Static Target Group named 'Candy List' which is ready to have Recipients added
How to Add Recipients to a Static Target Group via Import
You may have your list of Recipients for the Static Target Group stored on an external file. You can import this file to Agillic and add Recipients to your Static Target Group directly from it.
- Create an import file of Recipients. Learn more about creating an import file here.
- Open the Data module.
- Open the Import section in the left sidebar.
- Choose if you'd like to import your recipients to Staging or Production in the drop-down menu. If you want to import test recipient data, we advise you only upload your recipients on Staging. If it is live recipient data, we advise you only import to Production.
- Click the 'Browse' button and select your import file.
- Check the 'Add recipients to a static target group during import' checkbox.
- Select your Static Target Group from the drop-down. If you want to create a new Static Target Group, write the name of your new Group and click the plus icon. This creates a Group on both Staging and Production but only adds Recipients to the selected environment.
- Click 'Import' and a pop-up window will appear.
- Click 'OK'.
- Check that your import has the status 'success'. If not, investigate the failed import file.
Your recipients have now been added to your chosen Static Target Group.
When importing recipients to a Static Target Group, the recipients will also be created on the chosen environment like any other recipient. This means that the recipients will automatically be included in other Target Groups if they meet the Target Group Conditions.

Adding Recipients from an import file to the Static Target Group 'Candy List'
How to Add Existing Recipients to a Static Target Group
- Log into the Staging or Production environment depending on if you want to add Staging or Production recipients to your Static Target Group.
- Open the Data module and select Target Groups from the left sidebar.
- Navigate to an existing Target Group or create a new Target Group.
- Click on the 'Recipients' panel to fold out the Recipients overview.
- Click the 'Add Recipients to Static Target Group' icon. The icon resembles a pin. A pop-up window will appear.
- Select your Static Target Group from the list or fill in the name of a new Static Target Group and click the plus icon.
- Click 'OK'.
The recipients in the Target Group have now been added to your Static Target Group.
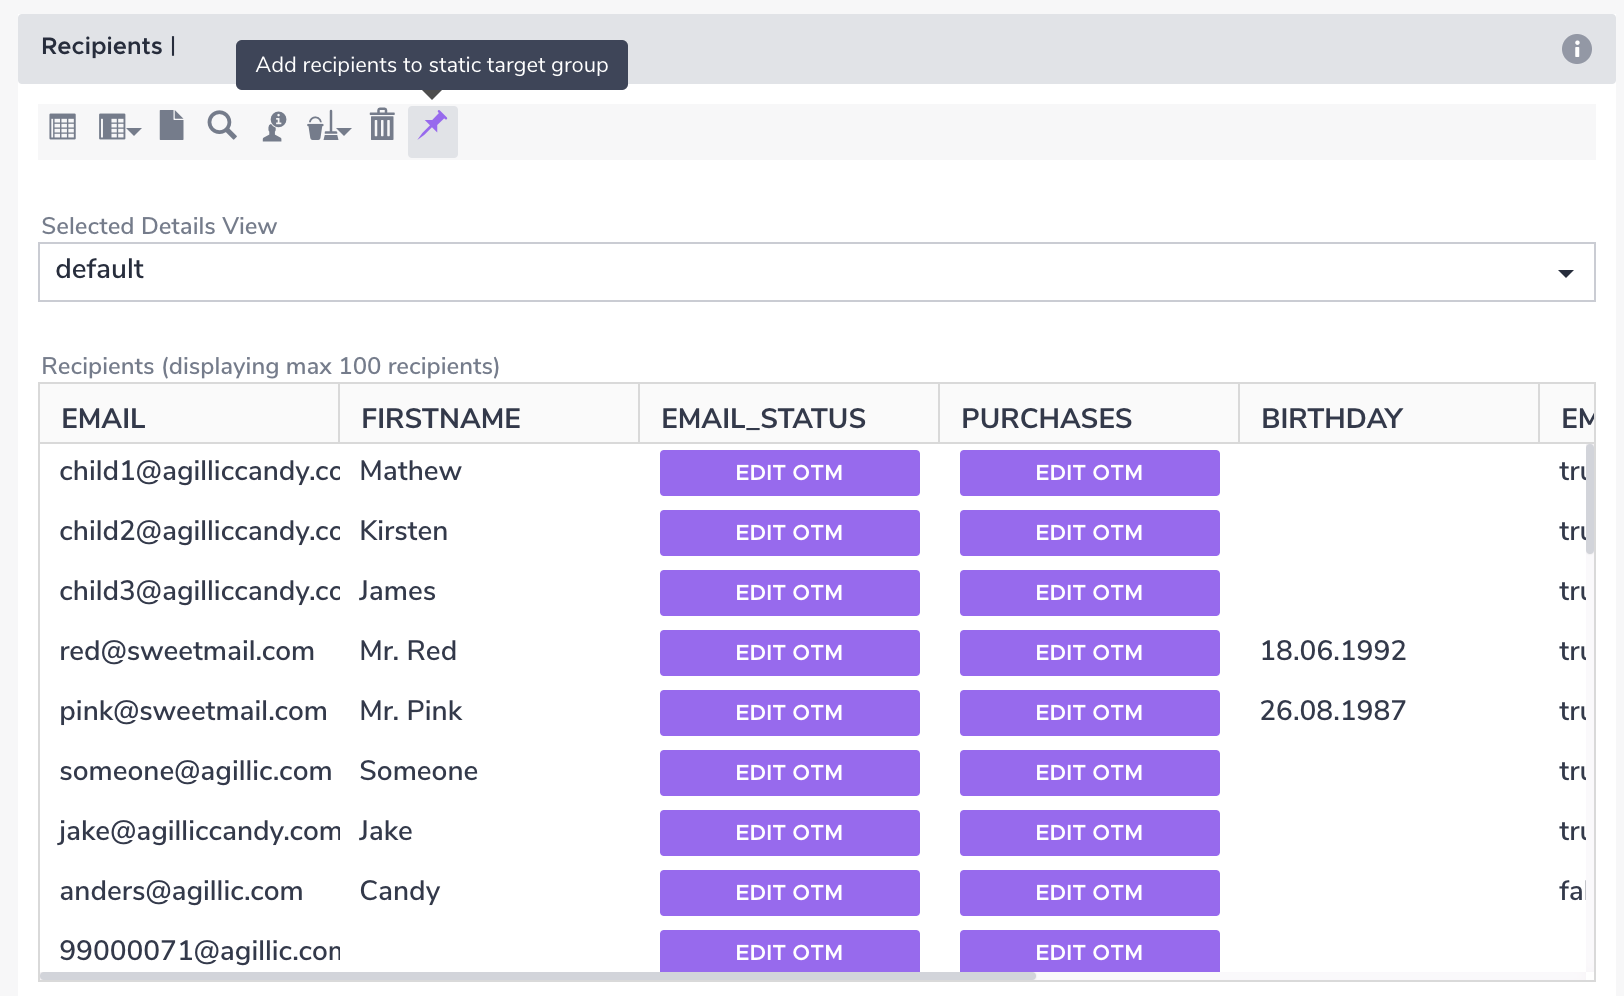
Preparing to add the Recipients from the Target Group 'Likes Chocolate' to a Static Target Group
Control Target Groups
You might need a Control Target Group so you can compare how well a new initiative, such as new dynamic content, a new special offer, or a new layout and styling, will perform compared to a previous set up.
To make this type of comparison, you might need a Target Group containing a random segment of recipients. Then, you could, for example, see how a Target Group might change so you can measure the effect compared to the rest of your recipients.
One way to create a Control Target Group is to use the fixed Person Data 'RANDOM'.
RANDOM is a Fixed Person Data field which sets a random four-digit value between 0-1 for all new recipients in Agillic. This makes the RANDOM Person Data field ideal for testing purposes since all recipients can be selected at random and the same recipients can be re-used several times. New recipients will be included in the Control Target Group when they're created and are assigned a RANDOM value which matches your Control Target Group's conditions.
If you'd rather select the recipients used in a Control Group yourself, you can create a Person Data field as a Boolean and import the value 'TRUE' to all recipients who you want to use for control purposes.
Once you've created a Control Target Group, you can use it as Conditions on Dynamic Block types, in other Target Groups as a Target Group Condition, or as a Condition on a Flow Step.
You can read more about testing on Control Groups here.
How to Create a Control Target Group Using the RANDOM Field
- Log into the Staging environment.
- Open the Data module.
- Create a new Target Group.
- Open the Conditions section for your new Target Group.
- Click on the small plus button and select 'Insert Condition'.
- Insert the following Condition: Person Data - RANDOM - Less than - 0.2 - Condition met. This Condition will find roughly 20% of all your recipients. The exact amount of recipients matching the Condition will change depending on the Agillic instance. If you want more or less recipients in your Control Target Group, you can always change the '0.2' to a higher or lower value.
- Click 'Save'.
- Optional: Get Population on Staging and Production to know if your Control Target Group contains the desired amount of recipients.
Your Target Group is now ready to run tests with.
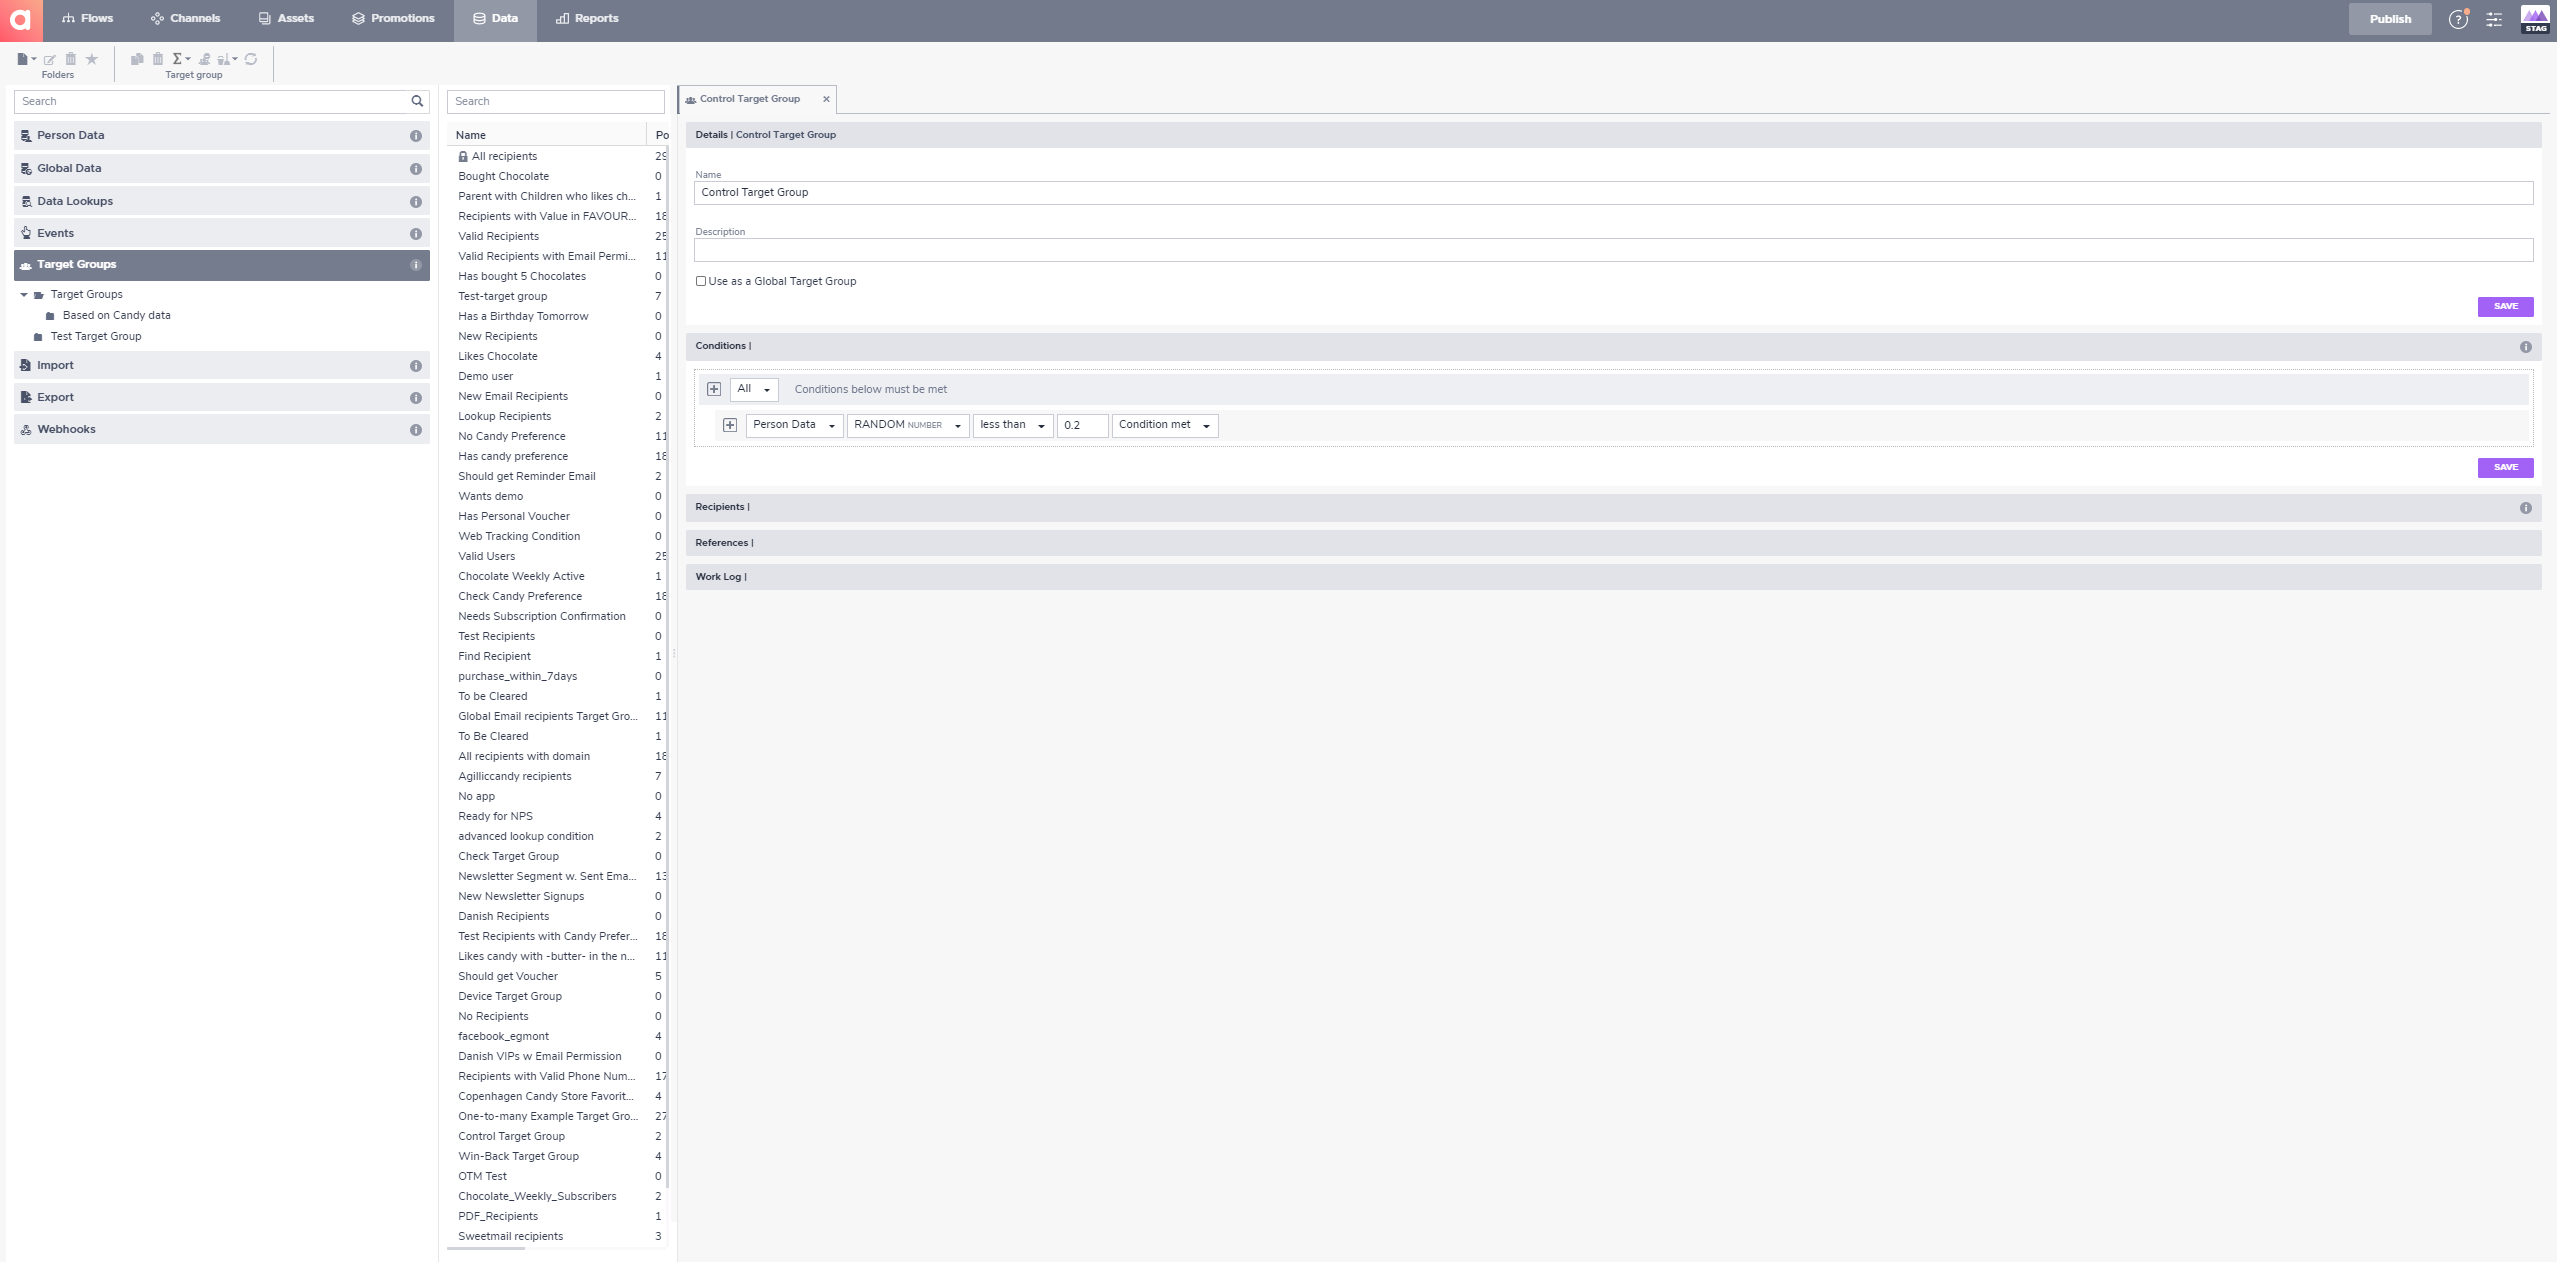
A Control Target Group containing all recipients which have a RANDOM value less than 0.2
Test Target Groups
A Test Target Group is an auto-generated Target Group that is using the test feature for either a Promotion or a Flow when testing your campaigns.
A Test Target Group in Agillic is vastly different from a standard Target Group. The Test Target Group generates one or more test recipients in it.
It isn't possible to manually remove or add a test recipient from a Test Target Group. You can delete the test recipients, but this will affect any Target Group using the recipient.
Learn how to create a Test Target Group via a Flow here.
Learn how to create a Test Target Group via a Promotion here.
How to Delete a Target Group
Deleting a Target Group is usually done if you no longer need to keep the Target Group. Deleting items, such as Target Groups, Content, or Flows must always be done directly on Staging and be published to Production.
When you delete a Target Group, you won't delete the recipients currently in it. If you want to delete the recipients currently in your Target Group, you can read about how to delete recipients here.
- Log into Staging.
- Open the Data module and click the Target Group subsection in the left sidebar.
- Search for the Target Group you would like to delete.
- Select the Target Group and click the delete icon in the Target Group toolbar.
- Click 'OK' in the pop-up confirmation.
- Publish to Production.
Your Target Group is deleted.
If you delete a Target Group which is currently being used in a Flow, it won't affect the recipients in the Target Group. These recipients will only be removed from the Flow if you remove them manually.
![]()
Click on the Delete icon to delete the Target Group 'Test-target group'
How to Calculate the Population of a Target Group
Once you've created a Target Group and added Conditions to it, you might want to know how many recipients meet the Conditions. This can be especially helpful if you're setting up a new Target Group and want to check it contains the expected number of recipients.
How to Calculate the Population of a Target Group
- Log into the Staging environment.
- Open the Data module.
- Open the 'Target Groups' subsection.
- Create a new Target Group or navigate to an existing one.
- Add Conditions to the Target Group if needed.
- Click on the 'Population' icon (Σ) in the top toolbar.
- Select 'Get population from Staging' or 'Get population from Production' depending on if you want to know the population for your test recipient or for your live recipients.
After you've completed these steps, a pop-up window will appear. It's here that you can watch your Target Group predictions progress.
The predictions are sample-based, which means that Agillic is able to automatically divide the calculations of larger Target Groups into multiple smaller calculations. This gives you much faster initial predictions as there’s no need to wait for all recipients to be counted before you see the numbers in the interface. So, if you’re working with large and complex Target Groups, this one will definitely come in handy!
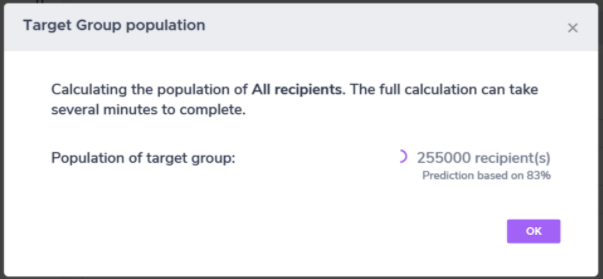
Pop up box for Target Group population
The time it takes to calculate the population depends on how many recipients are present in your Agillic environment, how many Conditions you include in your Target Group, and what type of data the Conditions use.
The Population column updates at midnight every day, as well as every time you execute a manual 'Get Population'.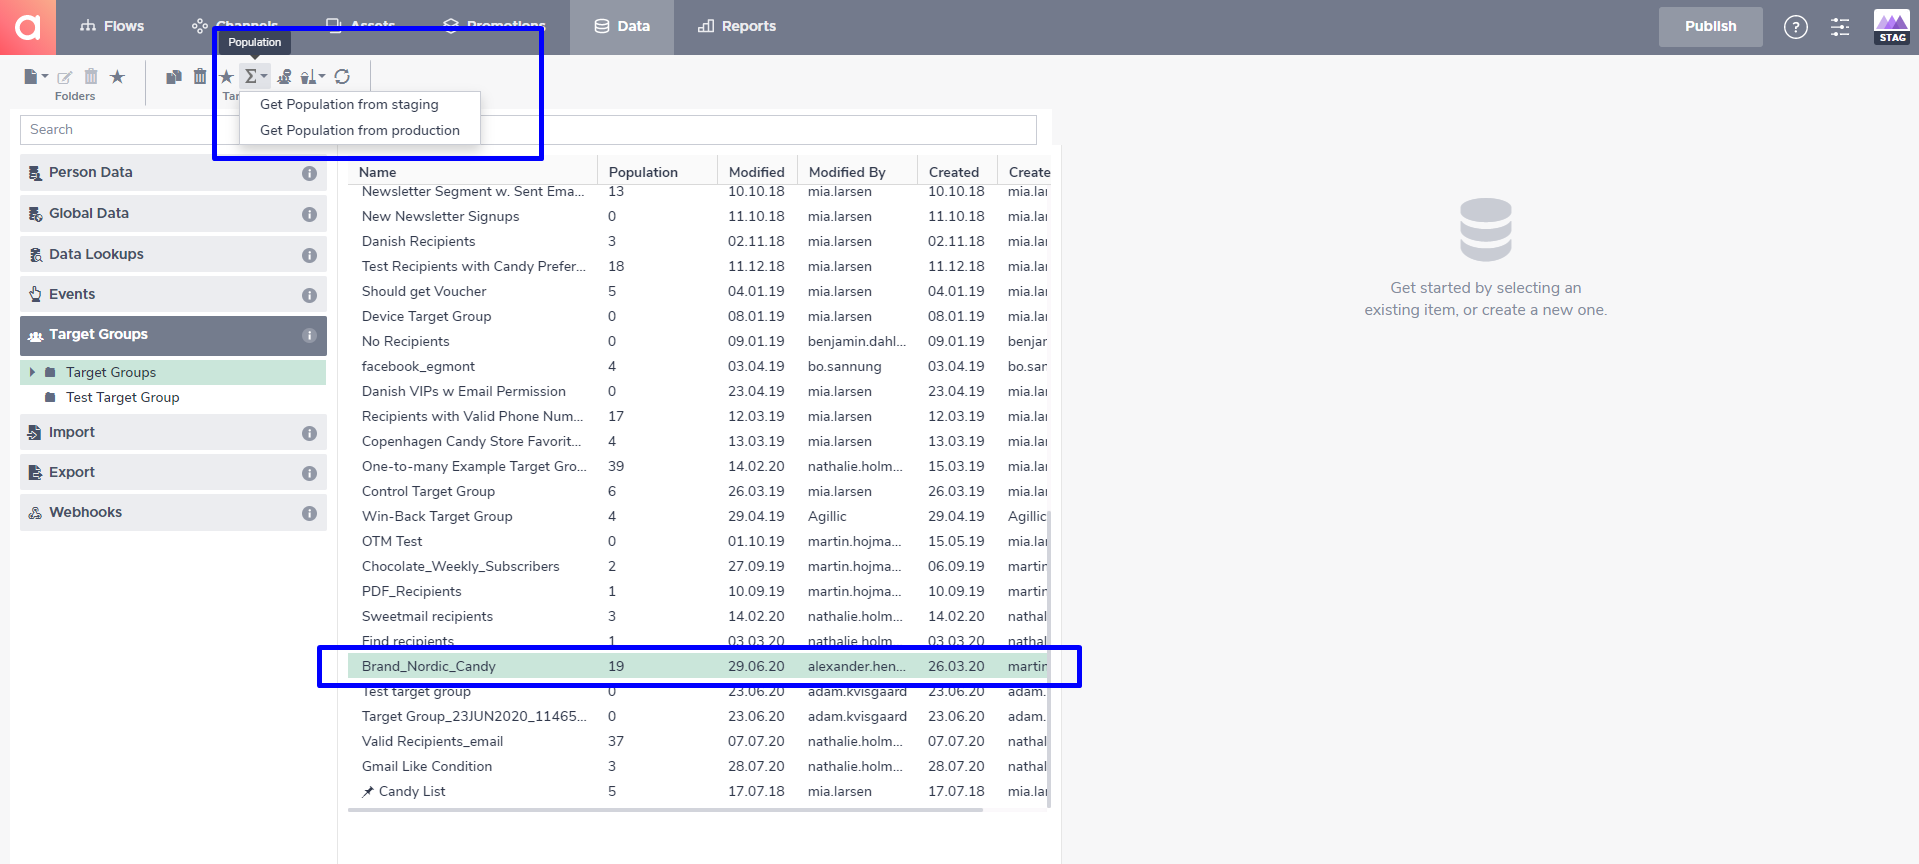
A Target Group named 'Brand_Nordic_Candy' which is ready to calculate the current population either Staging or Production. The last time a population count was made or the daily midnight count took place, the population was 19 as you can see in the 'Population' column.
Suggested Next Steps
- Learn more about Flows here.
- Learn more about How to add a Target Group to a Flow here.
- Learn more about Conditions here.
- Learn more about How to get the Population for a Target Group